There are many reasons to install metal roofing, such as adding durability to your home and helping to reduce energy costs. They also last much longer than an asphalt roof.
The metal roofing market was valued at $23.8 billion in 2020, and is projected to reach $33.5 billion by 2030, growing at a CAGR of 3.5% from 2020 to 2030.
Contents
Related post: How long does a metal roof last?
In many cases, it makes sense to remove an old or dilapidated roof and install a metal roof that is better able to withstand the elements.
The good news is that there are many different solutions in terms of installing metal roofing panels, including tin, aluminum and steel. As well, homeowners can choose from an array of colors, textures and styles.
The most popular material is steel, which is superior in terms of function and performance but is slightly more expensive.
If you are thinking about of metal roof installation, you will first need to gather together all the necessary supplies, remove your old roof, and then install a layer of insulation and the new roof.
The eight-step installation instructions below will show you how to install metal roofing panels as a weekend DIY project for your home. When you are finished with the metal roof installation, you will have a beautiful metal roof that completely protects your home from the elements.
Materials
A good metal roof installation starts with the right materials. DIY metal roofing installations will require the following materials:
- Ladder or scaffolding (tall enough to reach the roof)
- Jigsaw
- or power metal shears
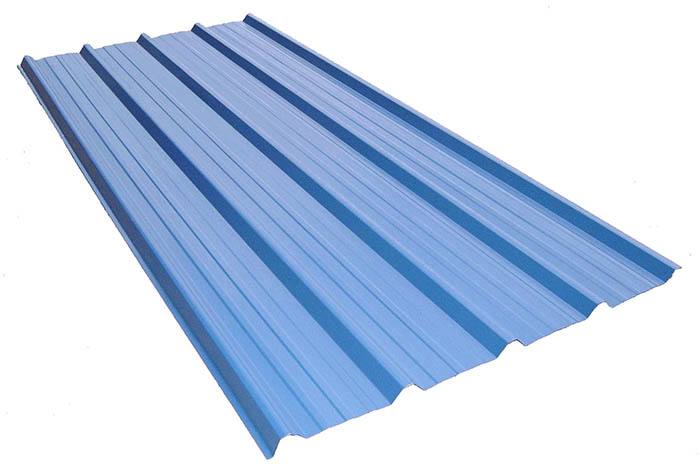
- Steel panels (rectangles or squares)
- Staple gun
- Drill and full assortment of drill bits
- 1 ¼ inch roofing nails
- Metal roofing screws
- Wood roofing screws
- Roofing felt
Step-By-Step
The following 8 instruction steps will guide you through the metal roof installation.
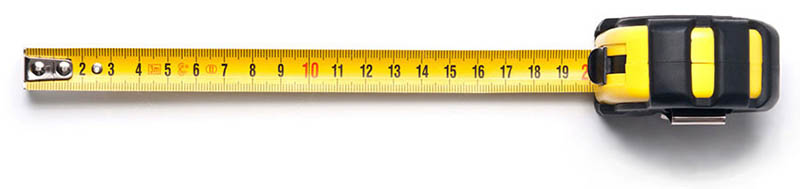
Step 1: Measure the roof area
You will need to order enough metal material to cover the entire roof, and this process starts with measuring the full size of your roof (in square feet).
You can measure the size of the roof from the ground, but it’s far more effective and efficient to measure it from on top of the roof itself.
Once you’ve arrived at a total square foot estimate for the roof, the next step is to add on an additional 10 percent to take into account potential waste (i.e. human error).
Step 2: Order the materials
You’ll want to order metal panels that are an appropriate color and look to complement your house. Generally speaking, metal panels come in a few standard sizes at a typical home improvement store.
You can also pay extra to have metal panels custom cut to match the exact size of your roof. However, if you have a standard home with a sloped roof, it’s best to opt for the default sheet sizes already available.
If you need to cut these for a tricky area of the roof (such as around a vent or chimney), you can use your power metal shears for each sheet.
Step 3: Remove the old roof
You’ve already determined that you are going to install metal roofing rather than just putting up new shingles, so you need to remove the old roof. You will want to do this on a dry and sunny day in order to minimize the chance of any water or moisture damage to your house.
It’s best to start from the highest point on the roof. First, focus on removing the oldest shingles that are sticking out, as well as any flashing or vents.
Remove any nails sticking out and reposition any metal gutters so that water flows properly off the roof. Then remove the rest of the roof, including all the shingles.
When you are done, you will see the bare bones of the roof frame and plywood sheathing (i.e. the old wood that was under the shingles). Make any necessary repairs as you get ready to put down the insulation.
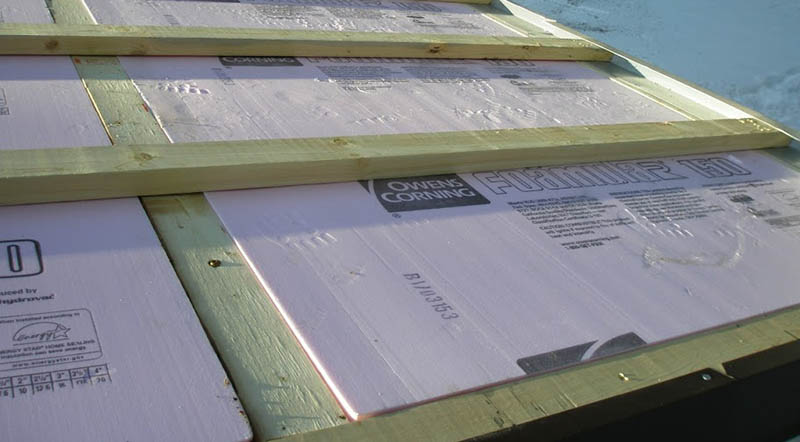
Step 4: Add insulation
Your goal here is to minimize the chances for any moisture to get from the roof to the structure of your home, so you will need to add a layer of insulation.
Typically, a layer of roofing felt will be enough insulation, but in locations with very dramatic weather conditions (very hot or very cold), you may need to put another layer of insulation and then adhere the two layers of insulation together.
You will secure this insulation to the roof frame with a staple gun and Roofing nails.
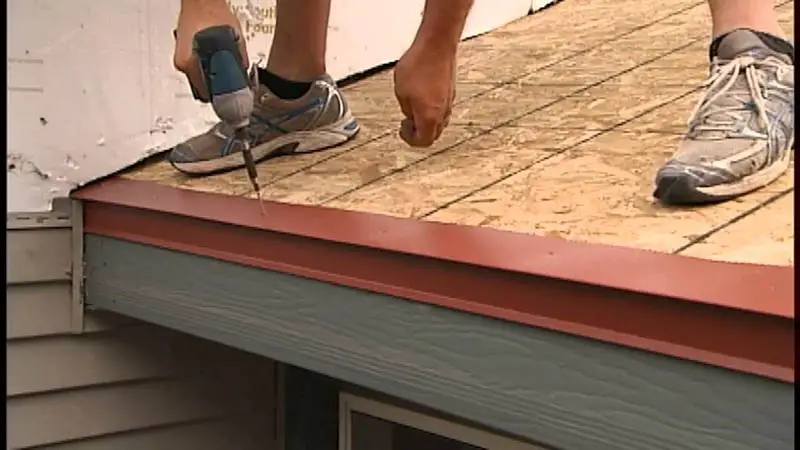
Step 5: Install the eave flashing
The eave flashing, or edging, is just the steel metal strips used to cover the entire perimeter of the roof. You are essentially sealing off the metal roof with this flashing, and you need to make sure that is securely fastened.
You can use 1 ¼ inch nails for the installation of eave flashing. Next, you are ready for the metal roof installation.
Step 6: Metal Roof Installation: Add metal panels
This is where you actually add the “metal” in the “metal roof.” Once you’re back up on the roof, start at the area with the longest square footage area.
This will be the part of the roof with the longest straight line between peak and eave. Visualize a straight line leading from the top of the sloping roof to the eave.
Keep in mind that the metal panels will not just cover the roof – they will also hang off the edge. As a rule of thumb, this overhang should be at least ¾ of an inch.
Depending on the style and aesthetic look you are aiming for, you could extend this overhang even more. Also, remember that your overall approach to installing metal roofing panels should be one that is “square to edge”.
In other words, you need to make absolutely sure that every square foot of the roof is covered in metal, and that means making sure all the edges are fully covered.
You will use Wood roofing screws to secure the metal panels to the sheathing. Try to space the screws about 12 inches apart down the entire piece of metal.
Moreover, try to ensure that the screws are all aligned evenly. And for any exposed fasteners, try to avoid over tightening them. Each fastener already has a rubber grommet that helps to seal the roof from moisture.

- Dimensions: 1/4" Hex Head - 1/2" EPDM Washer - Shaft .19" - Width .5" - Measures 1"
- Metal Screws are painted to closely match many brands of metal roofing though color may vary
- Colored roof screws head are painted with a two part polyurethane for longer product life (Not Zinc)
- Sharp T17 type point securely fastens metal roofing to wood structures quickly and easily
- No Paint/Galvanized Zinc screws go well with many types of gray, galvanized and other colors of roofing sheet metal
As you install the metal panels, make sure that the edges overlap at least 1 inch with the adjacent panel. You need to continue this process until the entire roof is covered. As an extra touch, you can use sealant.
However if you do, use a 100 percent sealant. Apply it before laying the metal sheet down. If it is a tight seal, the sealant will squeeze out toward the edges, which is what you want.

Step 7: Add the flashing to the roof
Now comes the part where you adding some finishing touches to the roof, ensuring that it is completely protected against the elements (e.g. rain, snow, hail). The flashing is the metal trim placed over the joints in the roof where the metal panels meet.
You are essentially adding an extra layer of protection over the most vulnerable parts of the roof: the joints.
Step 8: Finish
By the end of Step 7, every square inch of the roof should be covered in metal, the entire perimeter protected with edge flashing, and all the roof joints protected with flashing.
Still up on the roof, your next step is to make sure that all the edges are smooth and finished, and that all panels are fully secured to the roof.
After that, all that’s left is to gather up all the unused supplies and tools and dispose of any waste. You may want to keep any extra metal panels that you ordered in Step 1 just in case your roof needs repairs at some point in the future.
Safety Considerations
As a rule of thumb, metal roof installation can be dangerous. For this reason, some people may not want to make a metal roof installation a weekend project. It will be more expensive – but far safer – to hire an experienced roof contractor for the job.
However, if you are determined to make this a DIY project, you will need to take certain steps to guarantee your safety, such as making sure that you have a sturdy ladder or scaffolding for getting to the roof, a set of workman gloves for installing the metal panels, and the right tools.
Conclusions
By following simple, step-by-step instructions in metal roof installation, it’s possible to keep your home completely safe from the elements (wind, rain, snow, hail).
A typical metal roof installation can last anywhere from 30 to 50 years, so you will have made an important investment in the value of your home.
Best of all, the choices of materials today enable homeowners to choose metal panels that completely match the look and style of their home.
DIY metal roof installation means that you will have a beautiful, durable roof that also comes with energy efficiency gains. As a result, you will immediately start to make back some of your original investment.
Last update on 2023-07-04 / Affiliate links / Images from Amazon Product Advertising API

Hi, I’m Jim. I was a roofing constructor for 20 years, before deciding to start myrooff.com and gather the best content about roofing. I love woodworking and construction and it was only natural for me to start this passion project of mine. Thank you for visitng.