Home repairs are generally done on a per need basis. However, maintaining the roof in good condition is vital to keeping your family and home safe and sound. Shingles are your first line of defense on the roof against the elements.
So, it is crucial that you repair or replace them as and when the need arises. If this problem is not tended to on an urgent basis, it may lead to seepage and problems in the lower layers.
If delayed, it can also lead to a situation where a complete re-roofing is the only option left, making it way more expensive than replacing a few damaged shingles. You can get it done by a professional or even do it yourself.
If you are going for the DIY option, here is a complete rundown on how to replace roof shingles.
Replacing roof shingles is, without a doubt, a lot of hard work and requires you to make a time commitment too. Now, before you start working on that roof, it is important to take some safety precautions.
You should get hold of some protective eye and head gear, along with proper gloves and head gear, along with proper boots for the job. Pre-order the material so that you have everything in place before starting the project.
Also, pick a time during cool and dry weather, preferably in the morning. Rain and snow make roofs slippery and, consequently, moving about the roof becomes dangerous.
Also, the sun can heat up the roof, making it difficult to work. Make it a point that you have someone to accompany you while you are at the job.
- First things first. You have to make an estimate of the damage you are looking at. This is the first step towards learning how to replace a roof shingle. Assess the sides of the shingles and also see whether or not they are able to keep the moisture out. Depending on the condition, you may have to replace a couple of shingles or even re-roof the whole thing. In some cases, you may be able to repair it without even removing the shingles. So, analyze your damage, so that you can get going.
To climb up onto the roof, you can either get a ladder or set up a scaffolding. The latter is safer to operate with and it can be easily set up according to the height of the roof. You can also rent a unit for a day or a month depending on your requirements.
Before you learn how to replace shingles on a roof, you should learn which tools to use and when. You can use a simple four-pronged pitchfork or a flat bar, although a pitchfork is more preferable for the job.
Removing shingles without a pitchfork will definitely add to your workload if you are re-roofing.
You need to be careful while using the pitchfork. Clumsy handling of the pitchfork may damage the sheathing below the shingles. Therefore, slide the pitchfork carefully under the shingle in such a way that it lies flat against the shingle.
Then, push up the shingle using the pitchfork without digging into the sheathing below.
Also, make sure that you get roof jacks and harnesses, if you need to reach higher areas on the roof. Be very careful to make sure you have secured them properly before climbing.
If you only need to replace a couple of shingles, a flat bar might be a tool of your choice. A limited portion of the roof can be fixed with a flat bar and knives.
Generally, the five shingles, two rows above the damaged shingles, are removed. This would expose the nails and then you can remove all the shingles that are not in good shape.
You can re-use the shingles that are not damaged, which will help you save some money. From here, start progressing towards the damaged shingles. This will also bring forth any hidden damage.
- Once you are done removing the shingles, you can take off the nails with the help of a hammer. Gently pull the nails, so as to not cause any damage to the layer below. With the shingles removed, you can tighten the sheathing with the help of a galvanizer. This is an optional step to further strengthen the base of the roof.
Once you are done with this, you are ready for underlayment. If the roof does not have any felt paper installed, then start by placing one on the top of the sheathing before you begin replacing the shingles.
This will make the movement of the two layers independent. Place the next felt paper below the first one, so that in the event that the shingles on the top scrape off, your roof is still protected.

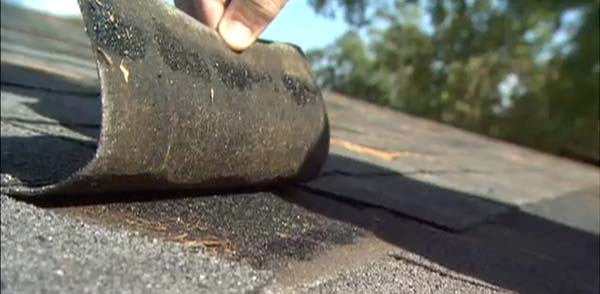
While some damaged shingles have damage such as cracks, leakages and so on, not all damaged shingles are immediately affected. Some of these damaged shingles are on the verge of giving away and causing you issues soon. A simple inspection will let you know when to replace roof shingles by just looking at them.
For instance, if the shingle is difficult to align or is curled, it is a sign that it needs replacement. Ideally, you should check your roof for any damage every six months, so that requisite measures can be taken in time.
- You will need replacement shingles, adhesive or shingle cement and of course, two to three inch thick nails. Some shingles also come with an adhesive strip that only needs to be taken off during replacement. Start by putting adhesive on the shingle, place it in the requisite area and secure it with the nail. Some shingles have pre-cut holes to help with installation. You can follow that or the pattern on your roof in order to set them up. Once done, reseal it by putting more adhesive near the edges of the installed shingles. You can follow the same steps if you want to learn how to replace missing roof shingles.

The adhesive is crucial to keeping the shingles in place and making the replacement durable. Also, if you have some cracked shingles, you can also apply some shingle cement to them making it resistant to further damage.
Securing the roof has to be a top priority when it comes to home improvement. So, if you are experiencing any damage in your roofing, it is advisable that you take care of it right away before it gets out of hand and puts a big dent into your pocket.
Last update on 2023-07-04 / Affiliate links / Images from Amazon Product Advertising API

Hi, I’m Jim. I was a roofing constructor for 20 years, before deciding to start myrooff.com and gather the best content about roofing. I love woodworking and construction and it was only natural for me to start this passion project of mine. Thank you for visitng.