Composition roof – A roof doesn’t just serve to keep the elements and weather at bay; it is also a very important structural component of any building because it provides protection for the entire structure.
Contents
Selecting the right roof design can make a big difference in the final outlook of your building.
If you are looking for a roofing system that is sturdy, long lasting and at the same time cost effective, your best bet is a composition shingle roof.
WHAT IS A COMPOSITION SHINGLE ROOF
A composition shingle has an outer layer made from an asphalt composition and the underneath part of the shingle, which lies against the roofing felt on the roof sheathing, is made of a fiberglass matting. The exposed side is often coated with colored granules.
Composition shingles are one of the most preferred choices for roofing because of the combination of the properties of asphalt and fiberglass, such as durability and lightweight respectively, making them suitable for most roofing applications and climatic conditions.
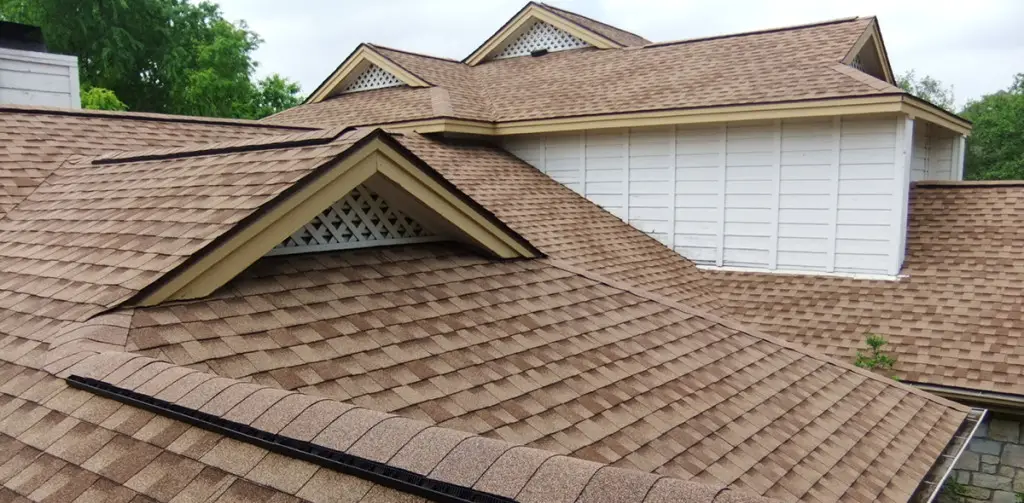
A Composition shingle roof or three-tab asphalt shingle is suitable whether you are undertaking a new construction or remodeling an existing one, because it adds to the overall quality and aesthetic beauty of your building while being affordable.
This is in addition to its ability to hold up under different weather conditions over a long period of time. A Composition shingle roof’s lifespan is between 20 to 30 years.
ADVANTAGES OF A COMPOSITION SHINGLE ROOF
Low initial cost: The cost per square foot of composition slate roof shingles is lower when compared to other roofing options.
Consequently, the framework required to hold the shingles is cheaper, thus making the overall roofing cost quite easy on the pocket. Additionally, the ease of installation further helps to reduce the cost of installation as less time is spent on the project.
- Durability: A Composition shingle roof is not easily damaged by weather variations and the design does not allow for moisture buildup.
- Aesthetics: With a composition shingle roof, you have an array of designs and colors to suit your style and enhance the beauty of your home. Although lightweight, their weight carrying capacity is high and you can walk on them without any noise.
- Low maintenance cost: Once the structure is set and all the shingles are well seated, composition shingle roofs require very little by way of maintenance as they remain solid through rain or shine. Cracked or broken shingles may come as a result of a storm at the early stages, but these can be easily replaced without affecting the entire roofing structure.
COMPOSITE ROOFING VS ASPHALT SHINGLES
The basic difference between composite roof shingles and asphalt shingles is in the under layer. The outer layer and matting of an asphalt shingle is made up of asphalt components.
On the other hand, a composite roof shingle has outer asphalt covering, while the underneath of the impregnated felt is made of fiberglass.
As a result, composite roof shingles are lighter in weight and therefore easier to load or lift up to heights and would require a less bulky framework for installation. Also, composite roofing has better fire retardant properties and tends to last longer than asphalt shingles.
Composite shingle roof life expectancy is typically higher than that of asphalt shingles with manufacturers offering warranties of up to 30 years.
This makes them more cost effective in the long run. Also, unlike asphalt shingles, composite shingles offer a wide range of design and color choices.
The advantage that asphalt shingles have over composite roofing is in their installation flexibility and better ability to absorb water.
Both composite roofing and asphalt shingles are made with non-reusable materials. However, the component materials of asphalt shingles are more environmental friendly than that of composite shingles.
HOW TO INSTALL COMPOSITION ROOF SHINGLES
Described below is the racking method of installing composition roof shingles:
- Time Frame: Three skilled workmen would typically require 2 days to completely shingle a roof spanning 1,500 square feet.
- Tools needed: A pneumatic nail gun for fastening the shingles Including a tape measure, roofing hatchet, a chalk line, a straightedge, a roofing square, a pry bar, a utility knife, caulking gun and tin snips.
- Materials required: Shingles, long roofing nails, roofing cement, and flashings
Firstly, prepare the roof by Installing underlay, drip edge, and valley flashing.
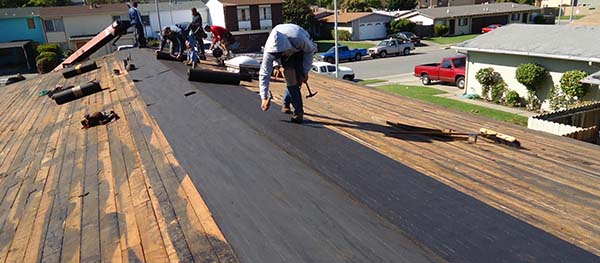
Load the roof, preferably with a boom with the shingles while being careful not to allow them slide downwards. Either spread the shingles on the roof for easy reach or stack them near the ridge.
Snap horizontal chalk lines so that you maintain a straight course. Then snap lines for every course or every other course.
Install a continuous starter strip or full-sized shingles, which are simply turned downside up. Often, however, a starter course is made of cut shingles.
Place the shingle upside down on a sheet of plywood and use a straightedge to cut it 7 inches wide; you will use the portion with no tabs.
Beginning at one end, place the starter shingles downside up with the self-seal strip near the bottom with the top aligned with the chalk line and the bottom flush with the bottom of the underlayment.
Attach each starter shingle by driving three nails along its top edge. Fastening along the top edge prevents the nail heads from being exposed.
To avoid ending up with a narrow strip of tab along one of the rakes, lay out a full course of shingles and adjust their position as needed.
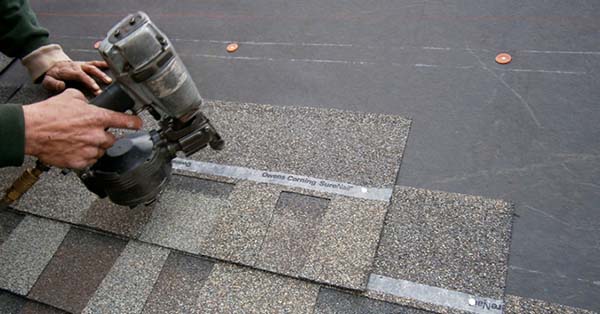
To attach a shingle, align it with the layout line and drive nails 1/2 inch above the cutout slots (including the half slots at each side). Drive a nail at one end first and afterwards, drive the others.
For a racking or mid-roof pyramid layout method, snap two vertical lines (called bond lines) near the center of the roof, the appropriate distance apart.
Check them with a framing square or measure so the lines are parallel with the rake ends. You can use the factory edges of a half-sheet of plywood as a guide.
To shingle around a dormer or other obstruction, install shingles all the way up and run at least one course past the obstruction. The bottom of these courses must be nailed higher than usual so you can slip shingles under them later.
Now, you can snap a new bond line to align the shingles on the other side.
Install four or five courses of shingles along the bond lines in an alternating pattern. Take care that the shingles are correctly aligned with consistent reveals.
Later, you will need to lift up the outermost ends of the shingles on each side in order to slip in a shingle, so don’t drive the outermost nails now.
Starting at the racked shingles, fill in the courses. Align the shingles with the horizontal lines and nail them in place. Note: In areas with high winds, it is common to drive two nails above each cutout line.
Shingles often have small cuts on the top and sides that can be used as guides for horizontal and vertical alignment. Use these whenever there is no layout line. Also, roofing hatchets and some roofing nailers have adjustable guides.
To apply flashing at a wall, slip pieces of step flashing under the siding where a wall is perpendicular to the roofing. Apply a flashing piece, then a shingle, then flashing, as you would apply step flashing for a chimney.
If the roof meets a wall that is parallel to the shingles, roof up to the wall, then slip a long, continuous piece of flashing under the siding and on top of the shingles.
At a peak or hip, shingle all the way up the first side until the reveal portion of the shingles is within 4 inches of the peak and cut the shingles just below the ridge. Shingle the other side and allow these pieces to overlap the ridge by no more than 4 inches.
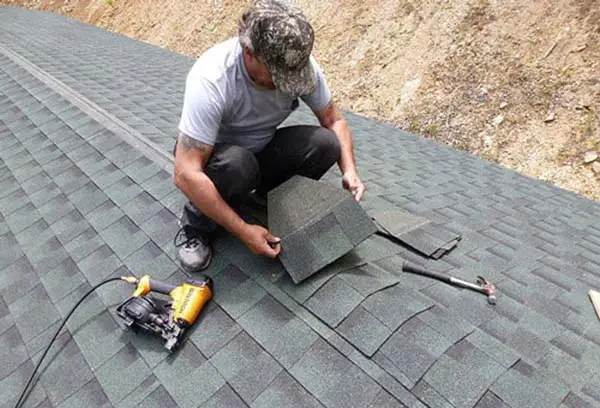
To cut ridge caps, turn shingles upside down and cut off single tabs. Angle the cuts slightly so the non-reveal portions will not be visible when the caps are installed.
Make a cut on the backside, then bend and break the shingle. Using a 5-inch reveal, estimate the number of caps needed. Prepare the ridge by snapping chalk lines 6 inches on each side.
Install ridge caps along the lines, leaving a 5-inch reveal. Drive the nails about 1-1/2 inches from the sides and just below the self-sealing strip. Shingle to the middle of the ridge, then start from the other end.
Where the ridge caps meet, install a 5-inch-wide strip. Cover nail heads with dabs of roofing cement.
If you have a hip that runs into the main roof, cover the area with WSU when you are installing the sheathing; cut the WSU so it lies flat at all points. Then cover the resulting V-shape notch with another piece of WSU. When you install the shingles, leave one shingle unnailed so you can later slip a ridge cap under it.
Last update on 2023-07-04 / Affiliate links / Images from Amazon Product Advertising API