If you have a flat roof or want to have a new roof for any room or garage at a low cost, roll roofing is the best solution. Usually, when you want to have a new roof for your house, you spend a lot of money and require many skilled people. But, in roll roofing, you can do it yourself at home. You don’t have to depend on any contractor. They are affordable and readily available in the market. So, it would be best if you had some time to spend on roll roofing.
Contents
Now the question comes how to install the roll roofing. Well, in this article, the discussion is done regarding roll roofing and its installation. Well, the installation is not a hard nut to crack. So, it would be best if you did not worry about it.
What Is Roll Roofing?
Roll roofing is a mineral surface product that is available in the form of rolls. The rolls are usually 100feet long and between six to twenty feet wide. They consist of different types of materials. It is the best alternative to concrete shingles or modern tiles but at a low cost.
Usually, people use roll roofing in sheds, garages, workshops, or any room with downward sloping. Its handling is relatively easy. You don’t need contractors for roll roofing. Well, you take the help of your friend or near and dear ones for roll roofing.
Nowadays, roll roofing is gaining popularity because it is an easy way to install a roof in your house.
Types Of Roll Roofing
#1. Ordinary Rubber Roll Roofing
Ordinary rubber roll roofing is the most common type of roll roofing, consisting of sawdust, slate dust, and recycling tires. You can easily maintain this rubber roofing. They are durable and cheaper as compared to other roll roofing.
#2.EPDM Roll Roofing
The EPDM roll roofing is also known as rubber membrane roofing because this rolled roofing consists of recycled rubber. They are very light in weight as compared to ordinary roll roofing. But EPDM is durable and easy to install.
You do not have to add any additional material during roll roofing because, in every roll, you will find adhesive seams that will protect your room or shed from leaks.
EPDM roll roofing usually lasts for almost 20 years and requires significantly less maintenance. So, isn’t it great?. You are spending little money buying this rolled roofing for your shed, and it lasts for two decades. It’s just wow to have EPM roll roofing.
#3.TPO(Thermoplastic Polyolefin) Roll Roofing
Many people prefer to buy TPO roll roofing because they are cheaper as compared to EPDM roll roofing. The TPO roll roofing consists of ethylene, propylene, and polypropylene. They are heat resistant. So, don’t allow the heat to enter the shed. Again they are corrosion resistant. So, algae don’t build upon this TPO roll roofing quickly.
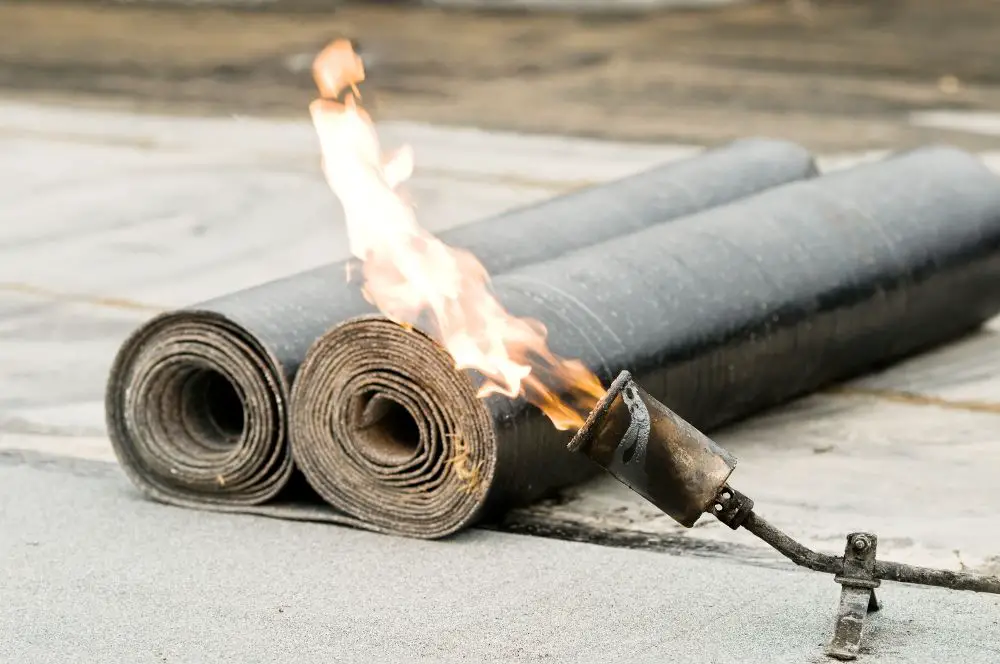
#4. Bitumen Roll Roofing
It is a type of asphalt roofing where the seams fuse. They are durable and can last for more than twenty years.
Advantages Of Rolling Roof
#1. Quick Installation
You can easily install the rolling roof on the roof of your shed or garage. The rolling roof is just like a carpet to your existing roof.
You need to peel the paper and stick it on your roof. Sometimes you need nails to hammer the rolling roof. Both processes are pretty easy, and you can easily install them.
#2. Low Cost
You don’t need any heavy machinery or skilled laborers to install a rolling roof on your existing roof. So, it saves your money. On the other hand, most of the rolling roofs consist of asphalt, whose cost is meager. So, indirectly the rolling roof cost is also low.
#3.Easy Repair
Usually, it’s pretty tricky to locate when there is leakage in conventional roofs. But when you have rolling roofs, then you can detect the leak quite easily and repair it.
Rolling Roof On A Flat Roof
If you question your mind regarding how to install roll roofing on a flat roof, you can go for the peel and stick method. The below steps will guide you for peel and stick roll roofing installation.
You can say flat roof as low slope roof. Peel and stick rolling roofs are the best idea for flat roofs. They will protect your existing roof and shed from heavy rain and scorching sun. The peel and stick rolling roofs consist of polymer, asphalt, and metal on the topside and self-adhesive below.
You can install it very quickly. It will not take much time. You need to peel the rolling paper and stick it on your roof. There is no need for any additional tools while peel and stick roll roofing installation. Another great advantage of these peel and stick roll papers is that they will never tear and dry over time. You don’t need any additional coverage to cover these rolling roofs. They are just great in protecting your roofs.
Procedure To Install Roll Roofing On Flat Roof
#1. Measure The Area Of Roof
First, you need to measure the length and breadth of your roof with the help of measuring tape. Then buy a rolling roof accordingly.
#2. Clean Your Roof
First, you need to sweep your roof to remove any debris like branches of trees, flowers, and various other things. You should also clean your roof correctly with a degreaser if it has any greasy or oily stains. Then wipe your roof with a cloth to remove the dust and dirt.
#3. Read the Instructions
You are opting for a peel and stick roofing roll. So, read the instructions carefully. Sometimes asphalt is put on the roof before applying the roofing roll. So you need to make sure about it by reading the instructions. Usually, the peel and stick rolling roof goes well with any primer.
#4. Alignment Of roll Roofing
In the third step, you need to align your roll roof. You should start from the lower edge and extend it to the side edge. As you start, pull the roll roof 6 inches backward and press it with your hand each time so that the roll will perfectly adhere to your roof.
#5. Peel The Roll Paper
Now you need to peel your rolling roof paper. You need to overlap the edge of the rolling roof with the new one by six inches so that there will be no water leak from your roof.
Rolling Roof On Low Pitch Roof
A roof mainly has three layers. The first layer consists of felt, and the other two layers consist of shingles. The rolling roof is just a single layer, and you can use it in a low pitch roof. It will protect your roof from all weather conditions. Even the rolling roof will prevent water leaks. So, it is an excellent idea to use the rolling roofs on a low pitch roof. The rolling roofs are available in different colors. So, you can purchase the color according to your choice. You require some additional tools during the installation of a rolling roof. Well, they are readily available.
You can do the installation by yourself but try to help your friend or relative do the installation efficiently and quickly.
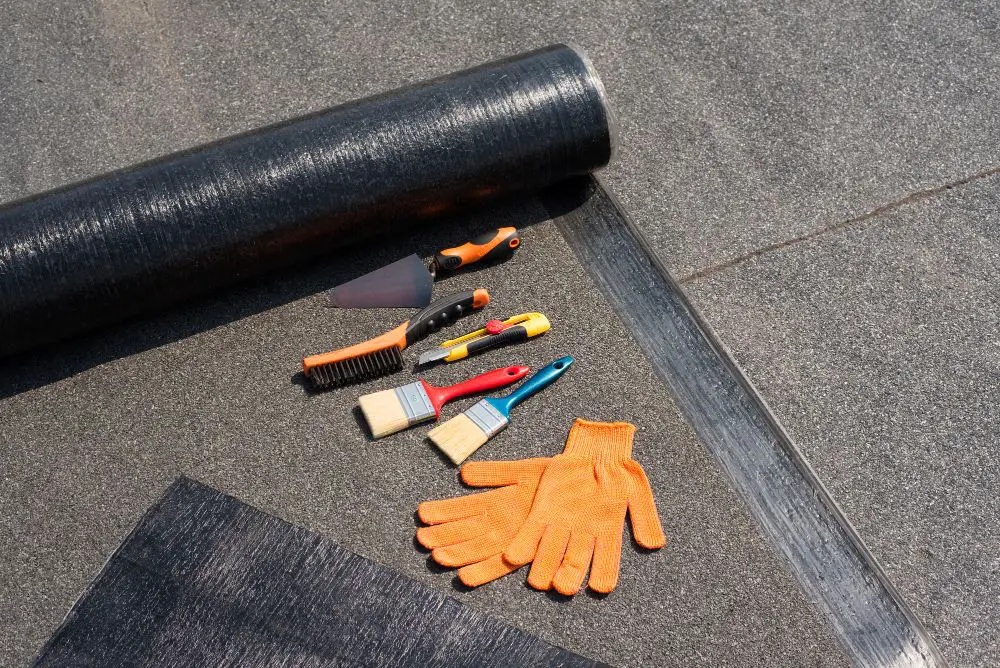
Tools Required To Install Roll Roofing
- Ladder
- Cement
- Roofing nails
- Roll roofing
- Chalk
- Roofing cement
- Broom
- Drip edge
Procedure To Install Roll Roofing On Low Pitch Roof
If you question your mind regarding installing roll roofing on a low pitch roof, the below steps will surely guide you. The above procedure is a concealed nail method roll roofing.
#1. Measure Area
You should first measure the length and breadth of your roof with the help of measuring tape. If your roof is in proper shape, meaning if you have a rectangular or square roof, it’s easy to calculate the area but if it is not in decent shape, then calculate the length and breadth and each uneven surface. Calculate the area of each surface of the roof and then add to find the total area. It’s not so tricky, but it will take more time for calculation.
#2. Purchase Roll Roofing
You need to purchase the roll roofing by visiting the hardware store. Different varieties of roll roofing are available. So, choose it according to your choice.
#3. Take Safety Precautions
It would be best if you did not go alone on the roof to do roll roofing. Roofs become a bit slippery when it is wet. So, you should not go above the roof while it’s raining or going to rain, even if you walk carefully on the slanting roof.
#4. Clean The Roof
You need to clean your roof thoroughly to remove any dust, dirt, or debris. The derbies can be a flower, branches of the tree. Then you clean it with water by hose pipe. You need to hose the roof from a safer place where there is no chance to fall from roof. Again if water accumulates and forms a gutter on your roof, clean it thoroughly by wearing gloves. You should dry your roof entirely before installation of the roll roof.
#5. Lay Your Rolling Roofs
Now lay your rolling roofs gently on your roof and place some bricks on it so that roofing roofs will not blow by wind. Allow the rolling roofs to dry for one or two days. If you plan to install the rolling roof in the winter season, you can keep your rolling roofs in the garage to avoid mist and dew.
#6. Identify The First Layer
Try to measure 35 inches or 89cm from the bottom portion of your roof and mark them with the help of chalk.
#7. Apply Roofing Cement
Roofing cement is readily available in the market. You need to apply the roofing cement on the edges and middle and bottom portion of your roof. Apply the roofing cement on your roof with the help of gloves.
#8. Cut The Rolling Roof
You need to lay the rolling roof from the bottom portion of your roof to the chalk line and cut the rest portion with a knife.
#9. Stretch The Rolling Roof
Stretch your rolling roof by hand to avoid any wrinkles. Then it would be best if you pressed them so that the rolling roof will adequately adhere to wet cement.
#10. Hammer The Nails On Rolling Roof
You need to use a good hammer and nails of at least 2.5 cm on a rolling roof. Then start hammering the nails at a distance of 10 inches or 25 cm apart.
#11. Identify The Second layer
To identify the second layer, you need to measure 35 inches from the first layer, and there you mark it with the help of chalk over the length of the roof.
#12. Apply Roofing Cement Again
Now it’s time to apply the roofing cement on the second layer, and then you can put your rolling roof. But try to place the first 6 inches of the second rolling roof on the first layer. Then repeat the process above—apply the same procedure for the entire roof.
#13.Secure The Nails Properly
When you completely cover your roof with a rolling roof, then it’s time to secure all the nails. For safety, the purpose is to apply a layer of cement over all the nails. You can cut the extra roll roofing with the help of a knife.
#14.Clean The Rolling Roof
After completing all the above processes, clean the rolling roof entirely with the help of the brush. Now your installation of the rolling roof is complete.
Conclusion
Rolling roofs are gaining popularity these days because they have a lot of advantages. You can easily install them in your garage or shed areas which will act as a protective layer to your existing roof.
This article explains how to install roll roofing in detail, hoping that you will need these days while roll roofing in your existing roofs.