When it comes to maximizing the functionality and aesthetic appeal of your outdoor living space, installing a roof under deck can be an excellent solution. In this comprehensive guide, we will explore various types of roofs suitable for different roof under deck styles, as well as their respective benefits and design considerations.
We’ll also delve into the materials commonly used in constructing these unique roofing systems and discuss important factors such as structural support requirements, ventilation needs, and local building codes. Additionally, you’ll learn about the costs associated with installing a roof under deck and gain valuable tips on maintaining its longevity.
Whether you’re a seasoned professional or just starting out in the world of decking solutions, our expert insights will help ensure that your roof under deck project is both visually stunning and structurally sound. So let’s dive right in!
Table of Contents:
- DIY Under-Deck Drainage System
- Spacing 24 Purlins Parallel to the House at 3 ft. on Center Intervals
- Attaching Spacer Blocks to Deck Joists Before Attaching Remaining Purlins
- Installing First Fiberglass Panel Using Roofing Screws
- Manufactured Under-Deck Systems
- Drainage Kits for Roof Decks
- Proper Gutter Installation
- Enhancing Ventilation and Maintenance
- Aesthetic Appeal with Under-Deck Drainage Systems
- Outdoor Curtains and Social Media Inspiration
- Frequently Asked Questions Roof Under Deck
- Conclusion
DIY Under-Deck Drainage System
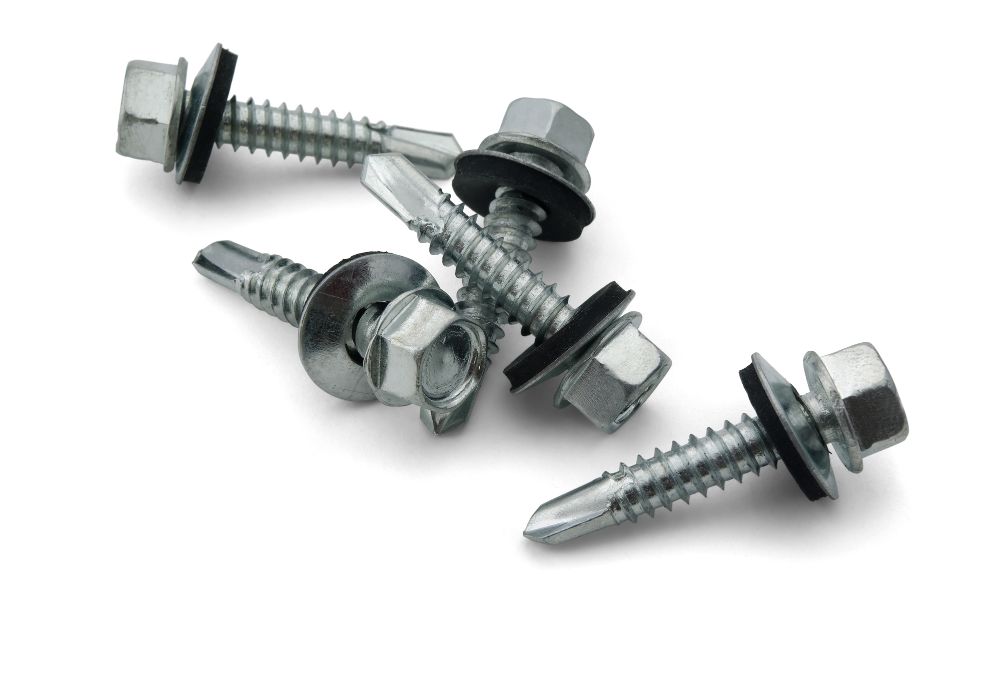
A low-cost and easy-to-build option for an under-deck drainage system is the one designed by Rune Eriksen, which uses corrugated fiberglass panels attached to purlins with special roofing screws, along with PVC gutters. This DIY approach not only helps maintain the structural integrity of your roof under deck but also creates a more appealing and functional outdoor living area.
Spacing 24 Purlins Parallel to the House at 3 ft. on Center Intervals
To begin constructing this drainage system, space out 24 purlins parallel to your house at intervals of three feet on center. These will act as support beams for the corrugated fiberglass panels that make up the roof under decks’ completed ceiling. Proper spacing ensures adequate weight distribution across all the boards while maintaining a consistent appearance.
Attaching Spacer Blocks to Deck Joists Before Attaching Remaining Purlins
Prioritize attaching spacer blocks made from treated lumber onto each joist before securing any remaining purlin supports in place using galvanized nails or screws. The purpose of these spacers is twofold: they provide additional support for dry space beneath your decking structure while allowing water runoff through gaps between individual boards.
Installing First Fiberglass Panel Using Roofing Screws
- Cut each panel according to measurements taken during initial planning stages.
- Lay down first panel perpendicular atop spaced-out purlin supports (starting closest towards home).
- Secure panel using specialized roofing screws with neoprene washers to prevent leaks.
Repeat these steps for each remaining fiberglass panel, ensuring that they overlap by at least one corrugation. This overlapping method helps create a watertight seal while allowing water runoff from the complete ceiling down towards PVC gutters installed along your home’s foundation line.
In addition to providing an effective drainage solution, this DIY under-deck system also offers aesthetic benefits. The use of corrugated fiberglass panels results in a ceiling finished and visually appealing, that can be painted or stained according to personal preference and complements various materials options available on the market today.
For a DIY Under-Deck Drainage System, proper spacing and installation of purlins and fiberglass panels is essential to ensure the system’s longevity. With manufactured under-deck systems, however, one can opt for a watertight membrane that offers an integrated gutter system for added protection against moisture damage.
Key Takeaway:
Rune Eriksen’s DIY under-deck drainage system is a low-cost and easy-to-build option that uses corrugated fiberglass panels attached to purlins with special roofing screws, along with PVC gutters. To construct this drainage system, space out 24 purlins parallel to your house at intervals of three feet on center, attach spacer blocks made from treated lumber onto each joist before securing any remaining purlin supports in place using galvanized nails or screws and install the fiberglass panels using specialized roofing screws with neoprene washers to prevent leaks.
Manufactured Under-Deck Systems
If you prefer a more streamlined and professional approach to creating an under-deck drainage system, consider opting for manufactured systems like TimberTech’s DrySpace or Trex RainEscape. These options typically involve covering the boards with a watertight membrane or installing gutter systems within the joists themselves. Opting for a pre-manufactured system provides the advantage of ensuring your outdoor area remains dry and comfortable, while also keeping its attractive appearance.
Watertight Membrane Installation Over Deck Boards
A popular method used in manufactured under-deck systems is applying a watertight membrane over the boards. This creates a barrier between the decking material and any water that may seep through from above.
The membrane is usually made from durable materials such as rubber or thermoplastic polyolefin (TPO), ensuring long-lasting protection against moisture-related issues. To install this type of system, follow the manufacturer’s guidelines carefully to guarantee optimal performance.
Gutter Systems Integrated into Joist Spaces
An alternative option for manufactured under-deck drainage systems involves integrating gutters directly into the spaces between your deck joists. This design allows water to be collected and channeled away from your home without being visible on your ceiling surface below.
Some advantages of using integrated gutter systems include their discreet appearance, ease of installation, and low maintenance requirements compared to traditional external gutters.
- DrySpace by TimberTech: Designed specifically for use with TimberTech decking products, DrySpace offers an easy-to-install solution for creating a dry space beneath your deck. The system uses vinyl panels and channels to collect and divert water away from the area below, providing a clean, finished look.
- Trex RainEscape: Compatible with any decking material, Trex RainEscape is an innovative under-deck drainage system that utilizes troughs and downspouts to direct water away from your outdoor living space. This easy-to-install option can be customized to fit any deck size or shape.
Manufactured systems such as Trex RainEscape provide both practical protection and aesthetic enhancements, making them an ideal choice for roof under deck projects. These options provide both practical protection against moisture damage as well as aesthetic enhancements for your covered patio area.
Manufactured under-deck systems provide a watertight membrane installation over the boards, as well as integrated gutter systems into joist spaces for optimal drainage. For an even more efficient roofing system, consider investing in a vinyl or aluminum based drainage kit to help prevent the buildup of moisture on your rooftop deck.
Key Takeaway:
To create an under-deck drainage system, you can opt for manufactured systems like TimberTech’s DrySpace or Trex RainEscape. These pre-made solutions involve covering the deck boards with a watertight membrane or installing gutter systems within the joists themselves to ensure that your outdoor living space remains dry and comfortable while also maintaining its aesthetic appeal.
By choosing one of these options, you can enjoy practical protection against moisture damage as well as aesthetic enhancements for your done ceiling area.
Drainage Kits for Roof Under Decks
Drainage kits made from various materials like vinyl or aluminum are available for purchase, providing effective protection against moisture-related issues while maintaining aesthetics. These kits require support beams installed underneath panels which then attach securely onto purlins using dedicated roofing screws. Let’s explore the components and benefits of both vinyl-based and aluminum-based drainage kit options.
Vinyl-Based Drainage Kit Components and Installation Process
A popular choice among homeowners, vinyl-based drainage kits offer a lightweight yet durable solution to under-deck water management. The installation process typically involves the following steps:
- Measure and cut support beams according to your deck dimensions.
- Attach the support beams to the underside of your boards with appropriate fasteners.
- Cut drainage panels to size based on measurements taken earlier.
- Securely fasten each panel onto purlins using roofing screws provided in the kit.
- Add gutter systems as needed at strategic locations along your roof under decks’ perimeter for optimal water flow control.
Aluminum-Based Drainage Kit Features and Benefits
An alternative option is an aluminum-based drainage kit that offers several advantages over its vinyl counterpart. Some notable features include:
- Durability: Aluminum is known for its resistance against corrosion, making it an ideal material choice when dealing with outdoor elements such as rainwater runoff from the decks. Aluminum materials are also known for their longevity, ensuring your under-deck drainage system remains functional for years to come.
- Ease of Installation: Aluminum panels can be easily cut and shaped as needed, allowing for a seamless installation process. Aluminum is much lighter than other metals, making it easier to manage when installing.
- Aesthetics: With its sleek appearance and various finish options available on the market today, aluminum-based drainage kits can add an attractive touch to any outdoor living space without compromising functionality or durability.
In conclusion,
Installing a drainage kit for roof under decks is essential to ensure proper water flow away from the home and reduce potential damage. Proper gutter installation is also critical in order to prevent flooding and further structural problems, which will be discussed in the next section.
Key Takeaway:
This section discusses the use of drainage kits for roof under decks, which are available in vinyl or aluminum materials. The installation process involves measuring and cutting support beams, attaching them to the underside of boards, and securing drainage panels onto purlins using roofing screws. Aluminum-based kits offer advantages such as durability against corrosion, ease of installation due to its lightweight nature, and aesthetic appeal with various finish options available on the market today.
Proper Gutter Installation
It is crucial to install gutters and downspouts as part of your under-deck drainage system effectively directing water away from your home’s foundation while preventing any pooling beneath your decking structure itself. Ensuring proper gutter placement will optimize performance over time.
Importance of Correct Gutter Positioning in Relation to Roof Under Decks
The correct positioning of gutters plays a vital role in the overall efficiency and longevity of an under-deck drainage system. Gutters should be installed at a slight slope, typically 1/4 inch per 10 feet, allowing water to flow smoothly towards the downspout without causing overflow or backflow issues. Additionally, make sure that gutters are securely fastened with appropriate brackets or hangers for optimal support.
Tips for Successful Downspout Installation
- Select the right size: Choose downspouts that can handle the volume of water expected during heavy rainfall events based on your region’s climate conditions. A general rule is one square inch of downspout cross-section for every 100 square feet of roof area.
- Position strategically: Place downspouts at least six inches away from walls and other structures to prevent potential damage caused by excess moisture buildup. If possible, direct them towards areas where they can efficiently drain into a stormwater management system or landscaped features like rain gardens.
- Add extensions if necessary: In some cases, it may be beneficial to add extensions or splash blocks at the base of downspouts to further guide water away from foundations and prevent erosion around deck supports.
- Maintain regularly: Regularly inspect and clean both gutters and downspouts to ensure they remain free of debris and function properly. This includes removing leaves, twigs, and other obstructions that can cause clogs or impede water flow.
By following these tips for proper gutter installation, you can effectively protect your roof under decks, boards, and home’s foundation from potential damage caused by excess moisture while maintaining a space that is dry beneath your covered patio. With the right materials and attention to detail during installation, you’ll enjoy a functional outdoor living area with an attractive completed ceiling for years to come.
Proper gutter installation is essential for a successful roof under deck project; if done incorrectly, it can lead to costly repairs and damage. By enhancing ventilation and maintenance, homeowners can extend the life of their roof under decks while also improving air quality within the home.
Key Takeaway:
Proper gutter installation is crucial for directing water away from the foundation and preventing pooling beneath the decking structure. Correct positioning of gutters at a slight slope with appropriate brackets or hangers optimizes performance, while selecting the right size downspouts, strategically placing them, adding extensions if necessary and regular maintenance ensures efficient drainage and protection against potential damage caused by excess moisture buildup.
Enhancing Ventilation and Maintenance
To ensure optimal performance over time, it is essential to add ventilation through strip vents for better airflow below the deck surface level. Proper ventilation helps prevent moisture buildup that can lead to mold growth and wood rot, ultimately prolonging the life of your roof under decks. Additionally, regularly using appropriate wood cleaners alongside annual staining/sealing treatments will maintain your under-deck drainage system.
Benefits of Adding Strip Vents for Improved Airflow
- Mold prevention: Adequate airflow reduces humidity levels beneath the boards, preventing mold growth on both the decking material and any completed ceiling components.
- Drying efficiency: Faster drying times after rain or snow reduce water damage risks while keeping your covered patio comfortable for use shortly after inclement weather.
- Pest control: Improved air circulation deters pests such as insects and rodents from nesting in damp areas underneath your deck space.
Importance of Regular Cleaning and Maintenance
Maintaining a clean roof under deck not only enhances its appearance but also preserves its structural integrity. Here are some tips for regular maintenance:
- Cleaning: Sweep away debris like leaves or dirt regularly with a broom. Use an appropriate cleaner specifically designed for roof under decks at least once per year to remove grime buildup effectively without damaging materials like composite decking or vinyl membranes.
- In-depth inspection: Analyze all parts of your material carefully during cleaning sessions; look out for signs indicating potential issues (e.g., loose screws/nails), and address them promptly to prevent further damage.
- Staining and sealing: Apply a high-quality stain or sealer annually, especially for wood boards. This treatment protects against moisture infiltration while preserving the color and appearance of your decking material.
Incorporating proper ventilation and regular maintenance into your under-deck drainage system will ensure its longevity, allowing you to enjoy a beautiful and functional outdoor living space for years to come.
For more information on maintaining roof under decks, check out this comprehensive guide on deck maintenance.
Ensuring adequate ventilation is essential for preserving the life of your roof, and can be accomplished by installing strip vents to facilitate air circulation beneath the decking.
By adding strip vents, you can ensure that air circulates freely under the decking, resulting in a healthier environment. With an attractive completed ceiling, installing an under-deck drainage system will add aesthetic appeal to your outdoor space while providing long-term protection against water damage.
Key Takeaway:
To improve the lifespan of your roof under deck, it is crucial to add strip vents for better airflow and prevent moisture buildup that can lead to mold growth. Regular cleaning and maintenance, including using appropriate wood cleaners and annual staining/sealing treatments, will maintain your under-deck drainage system’s structural integrity.
Aesthetic Appeal with Under-Deck Drainage Systems
Under-deck drainage systems not only offer practical benefits but also enhance the aesthetic appeal of your outdoor living space. By incorporating visually appealing materials and designs, you can create a cozy, durable, and weather-resistant atmosphere.
Wood Paneling Options for an Attractive Finished Ceiling
Wood paneling is a popular choice for homeowners looking to add warmth and charm to their under-deck area. Available in various styles such as tongue-and-groove or shiplap, wood panels provide an attractive finished ceiling while maintaining durability against moisture when properly treated. Consider using cedar or redwood for their natural resistance to rot and insects, ensuring long-lasting beauty even in harsh weather conditions.
- Tongue-and-groove wood panels: These interlocking boards create a seamless appearance without visible gaps between each piece.
- Shiplap wood panels: This style features overlapping edges on each board, creating subtle shadow lines that add depth and character to the space.
- Cedar or redwood options: Both types of wood are naturally resistant to rot and insects, making them ideal choices for outdoor applications like roof decks.
Fiberglass Panels as a Durable Alternative
If you prefer low-maintenance materials over traditional wood options, consider installing fiberglass panels. These lightweight yet sturdy material alternatives come in various colors and textures resembling natural elements like slate or tile.
Fiberglass offers excellent water resistance and is less susceptible to warping or rotting compared to wood, making it an ideal choice for roof under deck. Additionally, fiberglass panels can be easily cleaned with soap and water, ensuring your completed ceiling remains visually appealing over time.
- Color options: Fiberglass panels are available in various colors that mimic natural materials like slate or tile.
- Durability: Fiberglass offers excellent resistance against moisture and weather-related damage, outlasting many traditional wood options.
- Maintenance: Easy cleaning with soap and water keeps your under-deck drainage system looking fresh and inviting year-round.
Incorporating attractive design elements into your under-deck drainage system not only creates a comfortable outdoor living space but also adds value to your home. Whether you choose warm wood paneling or durable fiberglass alternatives, the aesthetic appeal of these materials will enhance both the functionality and enjoyment of your roof under deck area.
Under-deck drainage systems can help to create an aesthetically pleasing space while also providing the necessary protection against water damage. Outdoor curtains and social media platforms offer great inspiration for creating a beautiful roof under deck, making it easier than ever before to bring your vision into reality.
Key Takeaway:
Under-deck drainage systems not only provide practical benefits but also enhance the aesthetic appeal of outdoor living spaces. Wood paneling options such as tongue-and-groove or shiplap can create an attractive ceiling, while fiberglass panels offer a low-maintenance and durable alternative with various color options that mimic natural materials like slate or tile.
Outdoor Curtains and Social Media Inspiration
Adding outdoor curtains to your roof under deck can provide a touch of elegance while enhancing the overall aesthetic appeal. You can personalize your roof under deck to fit your own tastes by selecting from the range of materials and styles available.

Additionally, utilizing social media platforms for inspiration in designing roof under decks allows you to discover unique ideas from others who have successfully transformed their outdoor living spaces.
Choosing Suitable Outdoor Curtain Materials and Styles
Selecting the right outdoor curtain materials is essential for ensuring durability and weather resistance. Some popular options include:
- Sunbrella fabric: This high-quality material is resistant to fading, mold, mildew, and water damage.
- Polyester blend: A more affordable option that still offers excellent resistance against harsh weather conditions.
- Bamboo or natural fibers: These eco-friendly choices add a unique texture while providing adequate privacy.
In addition to selecting appropriate materials, consider different curtain styles such as tab top, grommet top or rod pocket designs. You may also want to explore various patterns or colors that complement your existing decor elements like furniture cushions or accent pillows.
Utilizing Social Media Platforms for Inspiration in Designing Roof Under Decks
Social media platforms like Instagram offer an abundance of creative ideas when it comes to transforming roof under decks into stylish yet functional spaces.
By searching hashtags related to deck design (e.g., #roofdeckinspiration), you’ll find numerous examples showcasing innovative uses of roofing materials, boards and completed ceilings.
Additionally, you can follow accounts dedicated to outdoor living spaces for regular updates on the latest trends and design ideas.
Sharing your own photos of your completed roof under deck project not only helps inspire others but also allows you to receive feedback from fellow enthusiasts who may offer valuable tips or suggestions for future improvements.
Remember that every successful project begins with a solid foundation – in this case, an effective under-deck drainage system that keeps your dry space protected while enhancing its aesthetic appeal.
Key Takeaway:
Adding outdoor curtains to your roof under deck can enhance its overall aesthetic appeal. Selecting the right materials, such as Sunbrella fabric or bamboo, and styles like tab top or grommet top designs are essential for ensuring durability and weather resistance.
Utilizing social media platforms like Instagram for inspiration in designing roof under decks is a great way to discover unique ideas from others who have successfully transformed their outdoor living spaces.
Frequently Asked Questions Roof Under Deck
What is the best roof material under a deck?
The best material for an under-deck area depends on your preferences and budget.
Vinyl-based drainage kits are affordable, easy to install, and low-maintenance. Aluminum systems offer durability, rust resistance, and a sleek appearance. Fiberglass panels provide strength and longevity while allowing natural light to filter through.
How do you maintain a roof under a deck?
Maintaining an under-deck roof involves regular cleaning of gutters and downspouts to prevent clogs or water damage. Inspect the materials for any signs of wear or damage that may require repair or replacement. Additionally, ensure proper ventilation by keeping strip vents clear from debris.
What is the ceiling under a deck called?
The ceiling underneath a deck is often referred to as an “under-deck” or “deck drainage system.” This structure helps divert rainwater away from the lower level living space while providing additional usable outdoor areas protected from weather elements.
What is the purpose of a roof under deck?
An under-deck roof, also known as a drainage system, serves multiple purposes: it diverts rainwater away from your home’s foundation; creates dry storage spaces beneath decks; provides protection for patio furniture or outdoor kitchens; enhances aesthetics with completed ceilings; and increases overall property value by adding functional square footage.
Conclusion
Installing a roof under deck can be an effective way to extend the lifespan of your outdoor living space and improve its aesthetic appeal. With proper materials, design considerations, and maintenance tips in mind, you’ll have all the tools necessary for building a safe and secure roof under deck that will last for years to come.
Before embarking on your project, ensure that you factor in the expense of professional installation services such as those provided by contractors, surveyors or architects.
Ultimately with careful consideration given towards each step involved in constructing a reliable roof under deck – you’ll find yourself enjoying more time outdoors without worry.
If you’re looking for reliable solutions to your roofing needs, visit Myrooff today. Our comprehensive website provides expert advice and resources to help make sure your roof-under-deck project is a success.