How to insulate an attic roof? Is it getting cold in your house? Is your heating bill sky high during the winter? The problem could be that you don’t have decent attic roof insulation.
Contents
One way to cut costs and keep yourself from living in a refrigerator when it gets chilly outside is to insulate the attic yourself using a few DIY techniques.
First, though, you’re going to have to decide what sort of materials you are going to work with and how you want to go about insulating your attic.
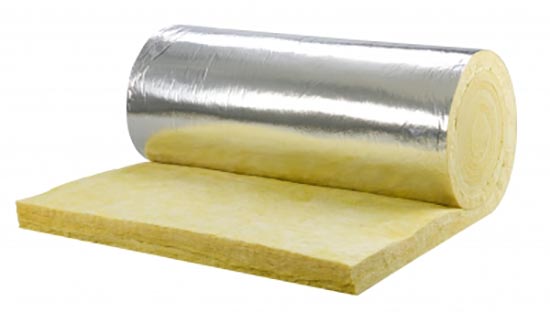
Blanket Insulation
The first and simplest kind of insulation is blanket insulation, also called “batt” insulation. This basically comes in rolls and you can lay it under the floorboards of your attic or anywhere else that you are planning to insulate.
This kind of roof insulation comes in a few different sub-types:
- Cotton Insulation
This kind of insulation is a little bit on the expensive side compared to other materials, but it can dampen sound as well as protect from the cold. So if you’re also looking to keep things quiet, this isn’t a bad choice.

- Cellulose
Basically this is insulation that’s made of paper. It’s some of the healthiest to have around if you tend to suffer from respiratory problems, but it’s also somewhat harder to find than other more common types of insulation.
If you’re willing to search for a company that makes it to your specifications, then this is also a good, if slightly expensive, choice.
- Fiberglass
This is the most common kind of insulation, and also one of the cheapest. If you want cost-effectiveness, this might be the way to go. However, if you are concerned about particles flying around and getting into your lungs, then consider a different kind of insulation.
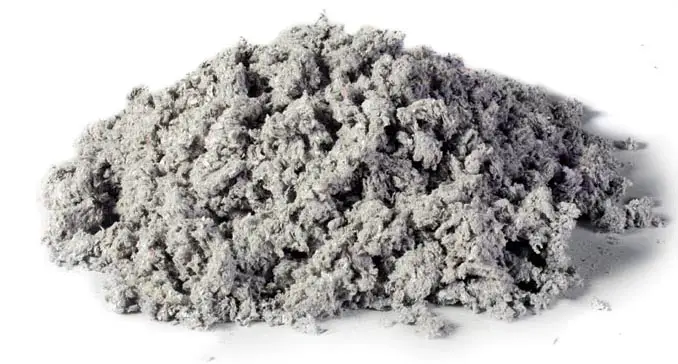
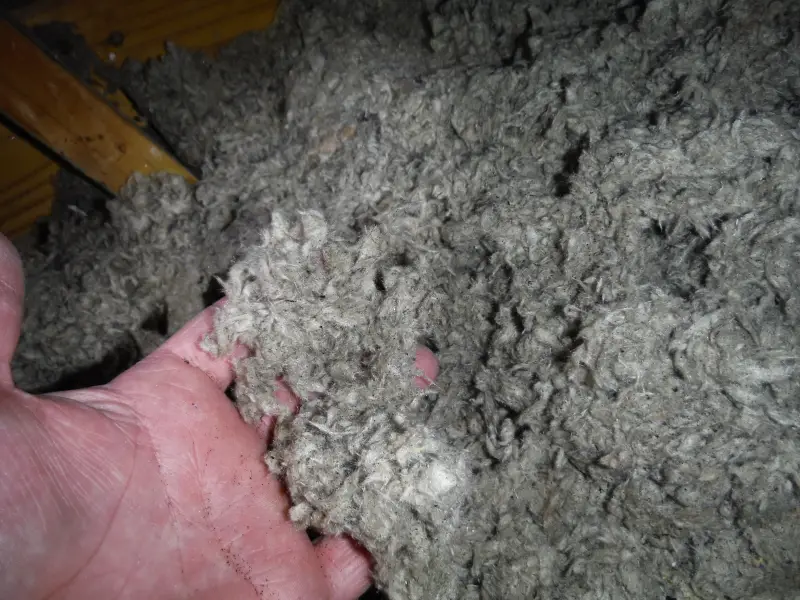
Loose Fill Insulation
The second major kind of insulation is the “loose fill” kind, which means that it comes loose in a bag and you use a special tool to blow it into the areas that need insulation. Just as with the blanket or batt insulation, it comes in a variety of materials:
- Cellulose
This works great as loose fill insulation, and in fact many homeowners use it. However, if you live in a moist climate, be aware that this insulation is essentially made from wood pulp. This means that it can be prone to the usual rotting and disintegration that any other wood-based material is faced with. Make sure that you keep it dry.
- Mineral Wool
Now, this material works especially well if you are hesitant to use cellulose or other similar materials because of the potential fire hazard. The only downside to this material is that it can be on the expensive side. Shop around for a deal.
- Fiberglass
Again, we come to fiberglass. Just as it can be used in blanket-style insulation, it can also be blown in as loose fill. It is cheap, but again, there are many particulates in this kind of insulation, so you may want to watch out if you have respiratory problems.
What you choose for your insulation is up to you and the climate that you live in, of course. Remember to pick something that will last and don’t always go for the cheapest deal.
Next, let’s look at some preparations that you need to make before you install the insulation.
Removing Old Roof Attic Insulation
Chances are, if your house isn’t brand new it has some kind of insulation already in it—it’s just that it’s not working very well anymore.
Insulation can definitely deteriorate over time, so you’re going to have to climb up into your attic and have a look at what’s going on.
If you see any insulation that has lost its “fluffiness” or looks ripped up, pull it out and throw it away because it’s not doing you much good.
The same goes for any insulation that is covered in fungus or appears waterlogged. Take note of any apparent moisture, though, as this could indicate a deeper problem. For example, you might have a mild roof leak that you didn’t notice before.
If that’s the case, you’re going to have to fix that leak before laying new insulation or you’ll be wasting your money!
Another thing to watch out for is the presence of asbestos. This is only really a problem to consider if you live in a house that’s more than a few decades old.
Just in case, though, keep an eye out for this kind of insulation. It can take on many forms, but usually it looks grey, light, and very fibrous.
If you suspect that there is asbestos in your attic, get a professional to clean it out, as this material can cause lung cancer.
Before You Lay the Insulation
First, get a sealant to properly block any air leaks that might be happening through your roof. If air is coming in or out from the outside, this will greatly reduce the efficiency of your insulation. You don’t want all that hard work to go to waste!
Next, determine how thick the insulation is going to need to be. This depends on what climate you live in, and it can be helpful to talk to your local government about what they recommend.
Another thing to keep in mind is to make sure that you rule out all possible fire hazards before you lay the insulation.
For example, any kind of vents or exhaust fans that blow hot air should be kept away from the insulation.
In addition, if there are any electric lights hanging from the ceiling below the insulation, you’re going to need to create some clearance because the heat could potentially produce fire.
Essentially, just keep every heat source that you possibly can away from the insulation.
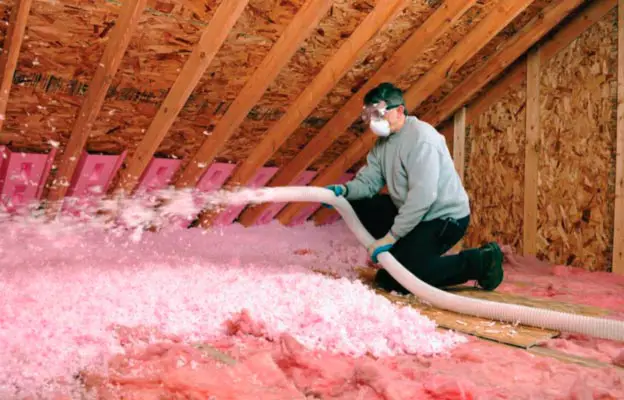
Finally, protect yourself. Many types of insulation have particulates that can get in your lungs, eyes, or on your skin and cause major irritation.
In order to mitigate these potential health hazards, always wear eye protection, a mask over your mouth and nose, and use gloves. Ideally, you should also wear clothing that covers your entire body.
Laying the Roof Insulation
Laying insulation is not a hard job, but it can be tedious. Here is how to go about the job if you are laying batt insulation, which is particularly simple.
How to Lay Blanket Insulation
- First, make sure that you are wearing all of your safety equipment, as discussed above.
- Get rid of any objects or trash that may still be lingering between the joists. This could be any storage items or old pieces of insulation that are unusable.
- In order to preserve the integrity of the insulation, it is a good idea to add a vapor barrier that will sit between the drywall and the insulation. Put the vapor barrier in first by stapling it to the joists. You may need to cut the barrier down to size before you lay it.
- Haul the insulation up to the attic. Don’t take it out of its original container until you are ready to roll it out, as this will keep insulation particles from floating all over the place.
- Once you’re in the attic, open up the containers and roll the insulation between the joists. Make sure that you don’t press it down too hard, because this could render the insulation flat and ineffective.
- Make sure that there isn’t any space between the rolls of insulation. If there is no joist between one “blanket” and another, they should be touching.
- If there is any electrical wiring in the attic either cut the insulation away from it or lift the wires away from the insulation, as it could become a fire hazard if the wires aren’t allowed to vent their heat.
- If you must place another layer of insulation, turn the blankets 90 degrees relative to the ones that you have already lain, and lay them across in that pattern.
- Lay floorboards on top of the joists for storage, if desired.
Next, let’s take a look at how to lay loose fill insulation. This may be useful if your attic has an unusual layout.
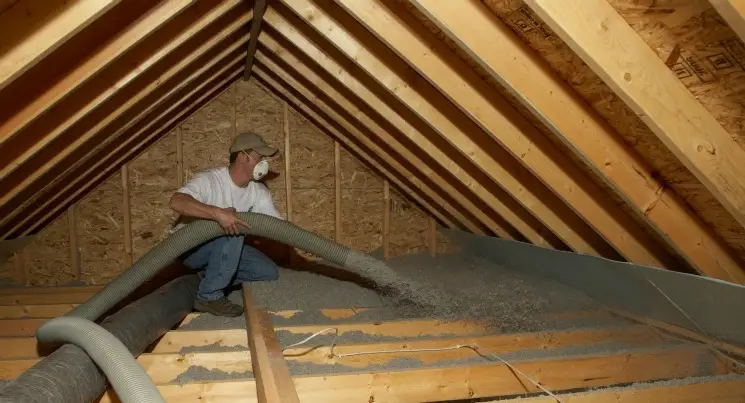
How to Lay Loose Fill Insulation
- As before, make sure that you are safely covered before laying your roof insulation.
- Remove any debris or objects from between the joists.
- Put a piece of batt insulation where the rafters meet the joists in order to keep the loose insulation material from falling through any cracks.
- Pour or blow the loose insulation material into the space between the joists until the material has filled this gap.
- Make sure that the insulation isn’t packed down and that the material fills the space up to about the top of the joists.
- Level the insulation until it is generally even across the entire attic. You can do this with any number of tools, but even just a flat piece of wood will do.
- As mentioned before, if you have any electrical fixtures in the ceiling below, you will have to keep the insulation from residing directly above them or it could become a fire hazard. One way to do this is to make a wooden box that creates clearance.
- If you need to add another layer, make sure to lay a piece of wood on top of the joists when you work, otherwise you may not be able to see where you should stand.
Using these steps to lay new roof insulation, you should be able to keep your home warmer this winter and save money on energy costs.
Last update on 2023-07-04 / Affiliate links / Images from Amazon Product Advertising API