The fun part of being in the roofing industry is that answers to questions keep changing every few years. I remember that there used to be a time when everyone would suggest placing the screws on the ridge rather than in the valley. These days, people have changed their minds completely on screw placement.
Contents
It’s important to keep updated on the latest in roofing methodology because while clients may learn from me, most of the time, I end up learning from my clients more!
In that spirit, some of the important questions that keep coming to me revolve around screws: how many, how to put them in, what types to use, and so on. I will try to answer these questions in this article.
Screw Pattern for Corrugated Metal Roofing
So let me start with the most difficult type of metal roofing: Corrugated roofs, specifically the ⅞” ones. The process of fastening varies between the metal siding as the actual roofing for corrugated metal roofs. On top of that, as I mentioned earlier, there are two ways to fasten. One way is in the Highs, and the other is in the Lows of the sheet.
I have had clients who swear by either of the two ways. I am quite ambivalent about where to place screws on metal roofing. I think there are pros and cons of both ways, so I will explain what those are:
Installing in the High
When the screw goes into the high of the sheet, water and dirt will never accumulate behind it. It will just roll right off. This means fewer chances of the screw getting water damage or debris weakening the joint.
On the other hand, there is a gap between the screw head and the actual joint between the metal panel and the roof structure. This means that the connection of the screw is slightly weaker. Secondly, there is always a chance of you over pressing the screw into the metal panel, causing damage to it.

Installing on the Low
Installing the screw on the low will not leave any space between the screw, the metal panel, and the roof. This will, in turn, be a much stronger joint. It’s unlikely that you will damage the metal roof panel by over-pressing the screw.
On the other hand, the Low of the corrugated sheet is like a small valley. And if you have ever been to a valley, you will know that they are great places to collect water. The washer of the screw is normally bigger than the screw head, which means that it will hold a larger surface area of water behind it, causing damage to the screw and its screw head.

Panel Sidelap Placement
Another consideration is the placement of the panel side laps. You will have to leave the last two highs on your corrugated panel for overlap with the next panel adjacent to it. Before placing the adjacent sheet on top, you should apply double-sided mastic tape as well.
How Many Screws for Corrugated Roofing
If you are using a 37-inch corrugated panel sheet with a “low” screw placement method, you will need to put in a screw line of four lap screws, followed by one more panel screw at the first
low” of the overlap and then another panel screw at the “high” of the overlap between adjacent panels (See diagram below)

When you are using a 37-inch sheet, you will place the lap screws after every 3rd corrugation. Whereas for a 39-inch sheet, they will be placed in a 4-3-3-3-3 pattern as shown below:

Screw Pattern For R-Panel And Metal Siding Panels
R-Panels and Metal Sidings are comparatively much simpler than corrugated sheets. You have to always place the screws on the panel ends. You also need extra screws on the ends of the panels.
You will need to use one lap screw and five-panel screws in each screw line of the panels. For the interior panels, you can put in one lap screw and three-panel screws.
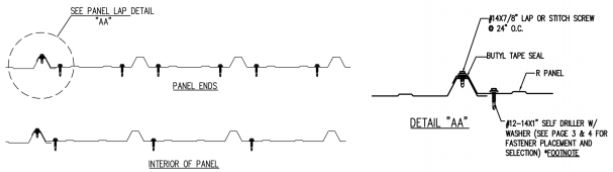
Screw Pattern For 7.2 Panel
This is perhaps the simplest screw line of all. Just put in a screw-on on every Low of the panel!

How Many Screws To Put in Metal Roofing
Most metal roofing projects use a 24-inch O.C. fastener. Keeping this in mind, I have calculated a simple formula below that you can use to determine how many screws you need to purchase.
If you are using different screw lines than the 24-inch ones, you might have to adjust to the calculations that I have given below.
How Many Screws per Square Foot of Metal Roofing
To determine how many screws you need to purchase for every square of your metal roof, you can apply a very simple formula. For every hundred square feet, you need to get eighty screws.
For example, if your roof is 4500 sq. ft., you should buy 45 * 80 = 3600 screws.
(4500 sq. ft. is equal to 45 roofing squares).
How Many Roofing Screws per m2
If your roof specification is in sq. mts. Instead of sq. ft., then remember this very simple formula. You will need five screws for every square meter of metal roofing.
For example, if your roof is 600 sq. mts big, you will need 3000 screws.
Trim And Panel Sidelap Screws
You will also need to buy a lap screw for every flashing and trim.
A simple way to remember how many Panel side lap screws you will need is to divide the sq. ft. by three (how wide the panel is going to be) and then 1.5(spacing of screws)
In the above example, you can divide 4500 sq. ft. by three to get 1500 and then by 1.5 again to get a thousand screws for the side laps.
Screw Line Spacing: Wood Substrate vs. Metal Purlins
Screw line spacing varies with the underlying layer on top of which you are installing the metal roof. Let me explain more here:
Metal Roofing On A Wood Substrate
While ideally, you should always consult with an engineer on screw spacing over a wood substrate, in practicality, this will rarely happen.
Most people usually opt for a 24-inch on-center installation of screw lines. Some might vary this by opting for 18 inch and 36-inch versions.
If you are ever in doubt, remember – more is always better.
Metal Roofing On Metal Purlins
Here it would be best if you went with the word of an engineer. They will look into a load chart and decide the right spacing for you. Once spacing is clear, you can attach each panel to each line of the metal purlins.
What Causes Roof Leaks?
Improper placement and installation of screws is the main reason for leaky metal roofs. If you know how to space your fasteners, how many to use, and the proper way to install them, there will be no reason to ever cause water leakage on a metal roof.
There are a few things that you should take care of:
How much pressure to apply
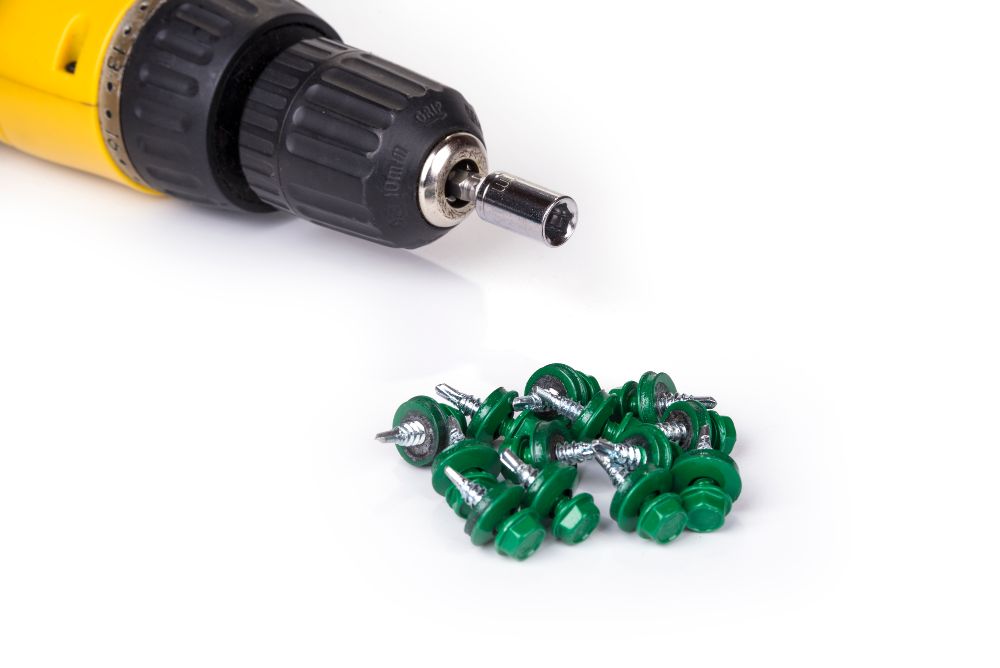
If you apply too much pressure on the fastener, the washer might crumble, which will leave the screw exposed to slowly becoming loose.
On the other hand, if you apply too little pressure while installing the screw. Just try and see if you can spin the washer with your hand. If yes, then it is too loose.
Slanted vs. Straight installation
It’s a natural impulse to fasten slightly slanted while tightening your screw. A slanted screw leaves open space between the washer and the metal roof, thereby creating a potential leak point. If your screw gets slanted when installing, untighten it, straighten it out and then tighten again.
Removing Swarf
Swarf is a name given to the chips and small scraps of metal that come off the roof when you apply your fastener. This little bit of metal dust rusts incredibly quickly, so you should make sure to clean it out with a soft cloth as soon as you install your screw.
Right Tools
Always use a screw gun, not an impact driver. You will never control the amount of pressure you exert on a screw when you use an impact driver.
Secondly, if you use a chalk line, preferably use light-colored chalk, like white or blue. Do not use deep colors like red which do not come off easily.
Wrap Up
Installing a metal roof can be easy if you understand the screw pattern, the length of the screw line, and the placement of the screws while installing. I have explained the most common types of screw patterns for metal roofing options in this article. Hopefully, I have been able to answer most of your basic questions.
If you have any other queries, comments, or suggestions, please share your thoughts in the comment box below. I will be happy to learn more from your experiments with metal roofing.