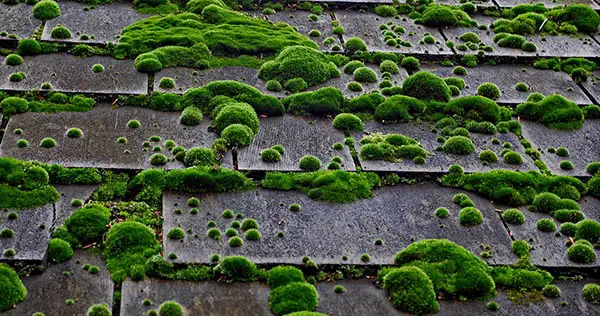
How to get rid of moss on roof. A thin layer of moss growing on the roof of your home may look quaint and rustic, but all that buildup actually leads to the deterioration of your roof.
Contents
If left to grow wild, this green moss will eventually cause shingles to be pried off, and can lead to potential structural damage to your home.
How and why moss grows on your roof
Before taking the necessary steps to repair your roof, you should have a brief background on why and what leads to moss growth on rooftops.
This is the result of moist, damp conditions that are left to accumulate over time, usually as a result of tree shade and irregular airflow that causes a buildup of debris.
That debris can act as a source of food and nutrients for the moss, enabling it to double or triple in size in remarkably little time. As the moss feeds in these damp, moist conditions, it continues to spread as far as it can.
So it’s obvious what you have to do: you have to get rid of moss that is already present on the roof, and you also have to take serious preventative steps to make sure that the moss won’t return.
It’s best to make moss removal a seasonal task, just like clearing out the gutters every spring or fall. Just keep in mind that you should clear a roof on a cloudy day.
If you try to clean a roof on a sunny day, the solution will evaporate too quickly and won’t be able to get rid of all the moss.
Below are the eight quick and easy steps that will explain how to remove roof moss in the best way.
Step one: Prepare your cleaning solution
Most experts recommend a solution treatment made of laundry chlorine bleach and water in a 50:50 mix as the optimal combination.
However, there are other DIY homemade solutions possible. For example, you can combine common household dish liquid and water in the same 50:50 mix, or you could also combine white distilled vinegar and water.
And, of course, there are plenty of solutions available in home repair stores under trade names like Moss Out, Wet & Forget, and Moss B Ware. You can order these online on websites like Amazon.com.
Step two: Gather all your cleaning supplies
While cleaning moss on rooftops is a fairly standard DIY job that any experienced homeowner can complete without the need to hire a contractor, you’ll want to gather a number of tools to make the job as painless as possible.
You’ll need a ladder that’s long enough to reach the roof, rubber gloves, a hose, some plastic sheeting to protect the outsides of your house, and a scrubbing brush for the roof.
Some home improvement experts recommend using the business end of a broom as a great tool for rubbing off the moss.
But keep in mind that killing roof moss requires more of a scrubbing than a thorough scouring, so you don’t want the bristles of the brush or broom to be too rigid. It’s best to pick one with soft bristles.
Step three: Lay out the plastic sheeting on your lawn or deck
The reason for using the plastic sheeting is simple – you’ll be spraying water down off your roof to the ground below.
That water is going to be mixed with chlorine bleach and/or other chemicals, so you don’t want that mixture sliding down and running down into your plants, bushes, or patio deck.
The same solution that can kill pesky algae is also the same solution that can kill your houseplants! Plastic sheeting – the type you might use for an outdoor paint job – works fine.
Step four: Get up on the roof and inspect the damage
Once you’re up on the roof, it’s time to inspect just how bad the roof moss damage is.
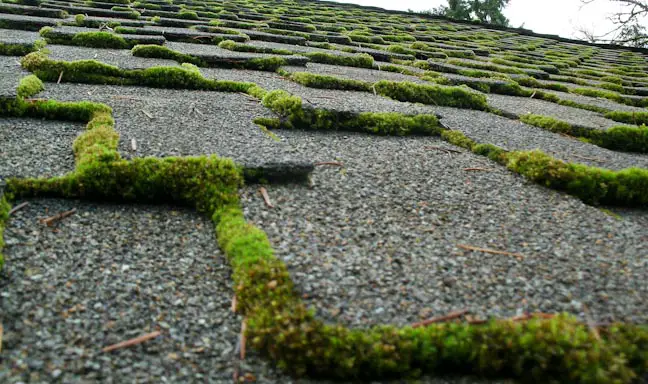
You’ll particularly want to see if the moss has actually started to grow underneath and around the shingles.
That’s a particular danger point, since unrestrained moss growth forcibly pries away the shingles, or leaves them so weak that strong winds can blow them off.
If too many shingles are lost, you’ll be dealing with replacing an entire roof instead of just getting rid of some unsightly moss!
Step five: Spray down the mossy area
Before applying any of the solution to the moss-infested area, you’ll want to spray down the area with a hose.
Always point the spray down the roof so the water runs down the roof to the ground. The reason for this is that if you spray up the roof instead, you run the very real risk of dislodging shingles that may have already been loosened by the moss.
Moreover, avoid any strong pressure spray systems, such as those you might use to clear a driveway or area of pavement. Your roof won’t hold up to such intense pressure.
Step six: Apply the solution and use a brush to scrub away the moss
After waiting 20-45 minutes to let the solution sink in, using a long-handled soft bristle brush you’ll need to scrub away and remove the moss on your roof. The optimal strategy is to divide your roof into a number of different square areas.
Then, work square by square as you clean the entire roof and remove the moss. In terms of the scrubbing motion, scrub from the top down rather than from the bottom up. Again, this is because you don’t want to weaken or break any of your shingles.
Rub gently, almost as if you are clearing a countertop. Don’t scrape, scour or pound on the roof. You’ll see the solution start to work almost immediately.
The mossy area will turn from green to brown to yellow. It will start dying very quickly, and will be easy to scrub away and remove.
Step seven: Rinse the entire treated area with water
This is not just a formality to clean the roof — it’s a way of ensuring that the solution continues to work even after you’ve left the roof area.
That’s why it’s important to work in shady or cloudy conditions so all of your cleaning solution doesn’t evaporate too quickly. Plus, as the water rinses down the roof, it will hit any hard-to-reach areas where you may not have scrubbed.
Then, simply take away the plastic sheeting, clean up all your supplies, and dispose of your cleaning solution in an environmentally friendly manner.
Step eight: Prevent the return of the moss
Moss cannot grow in open sunlight, so one easy step to kill and then prevent the return of moss is to trim or prune any trees that are growing directly over the roof. Also, make sure you have removed any debris on the shingles that might act as a source of nutrients for the moss.
If you don’t want to make moss removal a seasonal chore, it’s wise to invest in some preventative measures. Here are five “stop” measures recommended by experts:
- Go up on the roof and remove any debris;
- Trim and prune any tree limbs so that direct sunlight can reach the roof;
- Make sure that there is airflow around the roof, tiles or ridges, so that nothing gets trapped on the roof;
- Keep the gutter clean so debris doesn’t build up;
- Invest in asphalt shingles or tiles that contain copper granules/particles.
But there’s one more thing that you can do to prevent any moss from EVER returning, and that’s using strips of copper or zinc around the edges of your roof. Moss cannot grow in the presence of copper or zinc.
In general, copper is more toxic than zinc, but zinc is cheaper. If you fasten six-inch strips of copper or zinc on the top ridge on both sides of the roof, you can create an effective barrier against moss.
When it rains, the water will wash over the zinc or copper, creating a metallic-infused liquid that will wash over any moss and kill it.
Conclusion
Cleaning and removing the moss from your roof is a relatively straightforward DIY task that any homeowner can complete with some basic tools.
By removing moss before it starts to build up too much, you will be taking an important step in preserving the structural integrity of your roof, including the tiles and ridges.
Remember
Moss can cause any roofing material to degrade over time, not just wood and asphalt, but also metal and other materials.
And once the material degrades, that enables moss to move underneath the shingles and water can potentially leak through the roof.
In short, better safe than sorry – you need to remove it as soon as possible. Anytime you see moss build up, it’s time to take out the ladder and climb back up on the roof!
Last update on 2023-07-04 / Affiliate links / Images from Amazon Product Advertising API