Smetal roof installation”>tanding seam metal roof installation – Installing a standing seam metal roof can be a great way to improve the value of your home and protect it against the natural elements.
Contents
Moreover, a standing seam metal roof can enhance the aesthetic appearance of your home.
Before starting this project, however, be aware that a standing seam metal roof installation can be complex for first-time homeowners or installers.
That’s especially true if your roof has a lot of chimneys, skylights or valleys. So be forewarned: any cost you save upfront by making this a DIY project could be wasted later if you are required to make repairs as a result of roof leaks.
The following instructions provide details that will help you during installation.
Preparation
As a first step towards installing a standing seam metal roof, you will need to make a choice between aluminum and steel as your metal of choice for the roof installation.
While a steel roof is stronger and longer-lasting, it is also susceptible to rust. Thus, many experienced roofers suggest going with aluminum, especially if you live in an area with a lot of atmospheric moisture, such as along a coastline or near a lake.
That’s because aluminum will not rust. The tradeoff, though, is that aluminum is more expensive than steel.
After you’ve decided on your material for the installation, you’ll need to remove all the asphalt shingles on your roof (as well as any rotted wood they’ve been covering).
You need to get rid of these asphalt shingles to prevent any kind of “telegraphing effect,” which is what happens when the horizontally-aligned shingles punch through and cause dents in the vertically-aligned standing seam metal roof panels.
Not only that, but also the granular surface of the asphalt shingles can rub up against the metal panels, potentially causing them to rust from underneath.
Measuring the Roof
You will need to measure your roof – including every eave, gable, ridge, valley and side wall – in order to ensure that you buy the right size roof panels.
You need to take special note here: if the panels are too short, they will be unusable, so you must measure them carefully. Each measurement needs to be exact to the inch.
You need to measure the vertical run from the eave of the roof all the way to the ridge line and then add in another extra two inches.
These extra 2 inches will later form the drip edge hem, so it’s important to have this extra length for each panel. The typical standing seam drip edge extends 1 inch beyond the eave, and then it gets bent back by an inch.
Once you have the roof measurements, you’ll know how many panels are required for the installation. As a general rule of thumb, without going up on the roof, you can take the width of your home in feet, multiply this number by 12 and divide the result by 16.
Assuming each panel is 16 inches wide, this will tell you how many panels you need for installation on each side of your home.
Tools and Materials
The following tools and materials will assist you in the installation of the standing seam metal roof:
- Carpenter’s hammer
- Utility knife
- Carpenter’s pencil
- Sheet metal snips
- tape measure
- Sheet metal folder
- Cordless drill
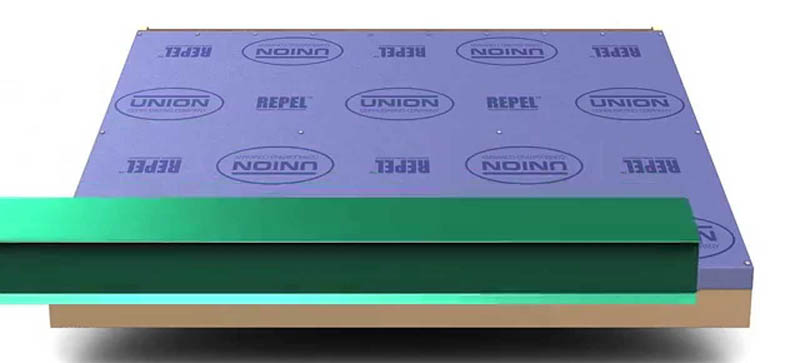
- Underlayment (must be durable and watertight)
- Nails and screws
- Sealant/caulking (must be watertight with strong adhesion)
If you will be installing a standing seam meal roof yourself, think about buying your metal panels from a local sheet metal roofing supplier.
This is because many suppliers can make your standing seam panels according to your exact details, right there on site. This could save you a lot on shipping before installation.
Step-by-Step Guide
The following steps will guide you in installing a standing seam metal roof. Carefully pay attention to each step and focus on your safety while up on the roof.
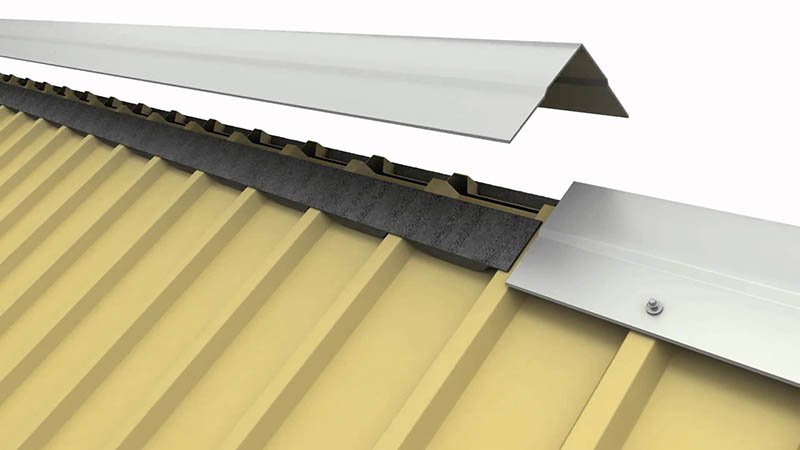
Step One: Eave Trim
The first flashing to install is the eave trim. Make sure you select an eave trim that is designated as appropriate for your specific roof pitch.
Place the appropriate eave trim in line with the substrate and fasten it to the decking 18 inches on center with roofing nails. The eave trim will then be fastened along the fascia with screws spaced 16 inches on center.
You will have to flash any two eave trims that meet. Cut the trim as needed and attach with the appropriate roofing nails and screws.
Take note of the angles being cut to allow the trim to overlap. Between any trim that overlaps, you will need to apply sealant. After all the eave trims are affixed, you are ready to move on to the next step.
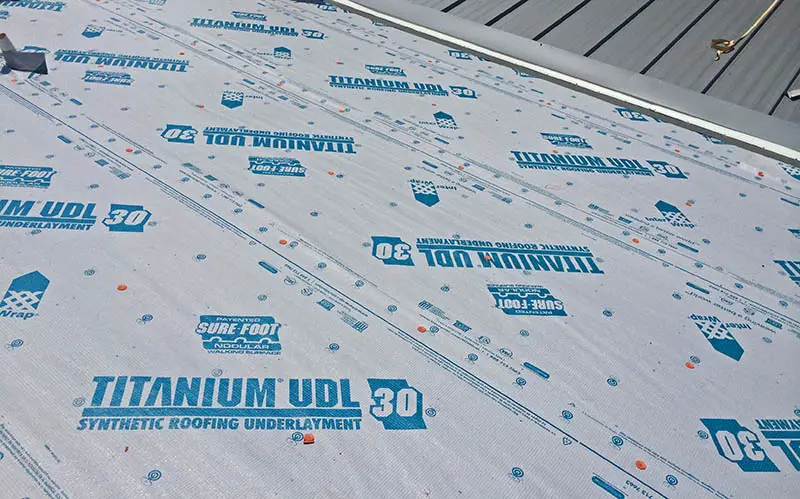
Step Two: Underlayment
You must now give your roof a layer of protection, known as the underlayment. Cover the entire roof with 30-pound felt paper or titanium underlayment. Then, carefully check the areas of the roof around chimneys, valleys or skylights.
Here, you will need to use an ice and water shield. This is especially true if you live in a cold climate.
Start the installation of the underlayment at the intersection of an eave and a gable end, and then roll it out parallel to the eave end.
Allow each consecutive course to overlap the previous one by at least four to six inches. Overlap the end a minimum of six inches when starting a new roll of underlayment.
Also, keep in mind during the installation that areas that have been cut or torn should be replaced or repaired prior to moving on to the next step. To prepare for installation of the first metal panel, you will need to apply sealant on the eave trim.
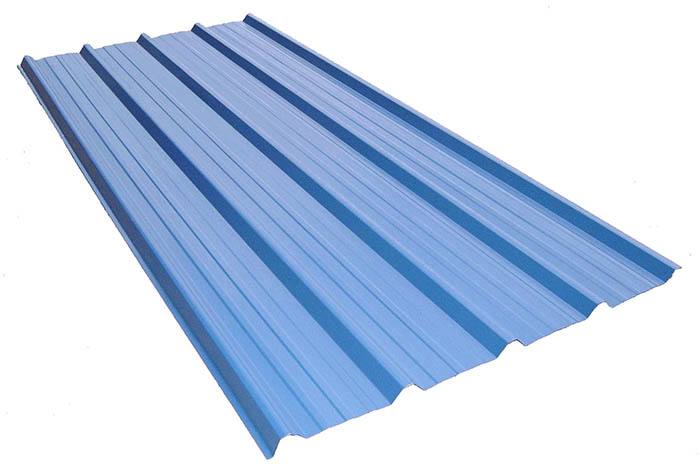
Step Three: Metal Panels
The first panel is the most important panel of your installation. Make a mark one inch from the end of the panel and cut along the base of each rib with snips. Use the bending tool to form a hem under the pan.
Cut off the underlap rib completely. Remove the leg and rib top from the overlap rib with snips, then tab around the rib and cut flush. Place an alignment line along the gable end, about a half-inch from the edge and square with the eave line. You will place your first panel here.
Set sealant tape along the eave trim. Place the first panel with the overlap leg along the alignment line. In cold weather slide the panels tight against the eave flashing, and in warm weather allow a gap for expansion. Fasten the panel side with screws and the top of the panel with mill point screws.
You are now ready for the second panel, which will be installed in the same way. Place sealant over the underlap rib before sliding the hem over the eave trim.
Snap the first two to three inches of the panel together, and slide the panel tightly against the eave trim, or with the gap depending on the temperature. Snap the panels together and fasten along the opposite side and the top of the panel.
The eave trim can then be tightened by crimping after the installation is complete.
Continue this installation process for the other metal panels.
Step Four: Gable Trim
While installing standing seam metal panels, there are two basic ways to trim the gables of your roof: You can use a special gable trim or a regular drip edge. The special trim is often easier and safer to install.
To finish off each end, cut along the bends and fold the top plane down 90 degrees toward the eave trim and cut other flaps flush. Then install a bead of sealant tape along the rib of the panel, laying the gable trim in place.
Fasten along the fascia board every 24 inches on center with a wood fastener or mill point screws.
Step Five: Ridge Caps
Next comes the installation of the ridge caps. Place the ridge cap over the panel and fasten with stitch screws through each rib.
Overlap the next ridge caps 6 inches with sealant between the laps. As an option, you can install solid or vented z-bar flashing between the ribs and fasten this down with roofing screws. Use sealant between the z-bar flashing and the metal roofing panel.
Also, seal the opening between the z-bar flashing and ribs on each end of the z-bar. Apply sealant to the back side of the closure near the ribs and over the flanges to seal gaps.
Step Six: Valley Flashing
Now it’s time to focus on the valley flashing. You will first need to place an ice and water shield down the center of the valley. Cut the valley flashing to the angle and length needed to secure it over the ice and water shield.
Apply roofing underlayment on top of the valley flashing. You can now install the valley cleat.
Apply a bead of sealant tape to the bottom side of the valley cleat. Position the valley cleat 6 inches away from the center of the valley.
Fasten with screws spaced 12 inches apart. Now you can start cutting and hemming panels for the valley.
Before installing the panels, place a bead of sealant tape along the eave flashing and on top of the valley cleat.
Cut the climate guard panel at the appropriate angle and length to allow for a 1-inch hem at both the eave and valley cleat.
This is done by cutting along the rib, so the bending tool can be used to complete the hem. To finish off the overlap rib, cut the metal to allow the inside flap to fold over the opening where it can be cut flush with the edges.
Installing the panel can be done by placing sealant over the underlap rib and aligning the panel before snapping the panels together. Once aligned, snap the panels together, working from the eave up the run of the panel.
Secure the top of the panel with mill point screws. To finish off a panel at the gable end for side wall, first determine the width of the panel needed.

Step Seven: The Hip Cap and Hip Cap Enclosures
You must now close off the void created between the hip cap and flat portion of the panel. You will need to place sealant tap in the pan of the panel where the J-trim will go.
Cut the J-trim to the desired shape and position the trim in the pan of the panel over the sealant. Fasten the trim to the panel with screws.
Use sealant up the back side of the closure near the ribs and over the flanges to seal the gaps. When the top of the panel meets a wall, it is finished off by using a closure strip with sealant around the perimeter and set in place on the panel.
Place a line of sealant across the tops of the J-trim and closure strip before attaching the hip closure. Place the hip cap down and fasten with screws at every rib.
Keep in mind that the bottom of the hip cap was bent down to give a finished appearance.
Safety Considerations
Roofing installation can be dangerous work, so you must make safety a priority during installation. If you are doing this project by yourself, you might want to consider using a full body harness and a fall protection system.
Also, you should always have a good understanding of which steps come next as part of the installation process.
Conclusion
By following the above steps of how to install a standing seam metal roof, you will have completed a very important home improvement project. In most cases, what looks like an easy task at the outset – just putting up a lot of metal panels – turns out to not be so easy.
But you will have completed the installation of your standing seam metal roof! You now have a metal roof that will last for a lifetime, protecting you and your loved ones from all the natural elements.
Last update on 2023-07-04 / Affiliate links / Images from Amazon Product Advertising API