Hshed roof step by step”>ow to build a shed roof step by step? – Well, for many homeowners, a backyard shed is the perfect storage place for tools and gardening supplies.
Contents
It can even function as an auxiliary workspace. After determining where to place the shed and its approximate size, the next question on the minds of many homeowners involves how to frame a shed roof.
This shed roof frame needs to provide sufficient protection against the elements, of course, but it also should blend into the surrounding aesthetics of the home. Thus, the decision of how to frame your new structure starts with considering the various roof styles available.
Styles
As a rule of thumb, there are three framing styles that are most popular with residential homeowners:
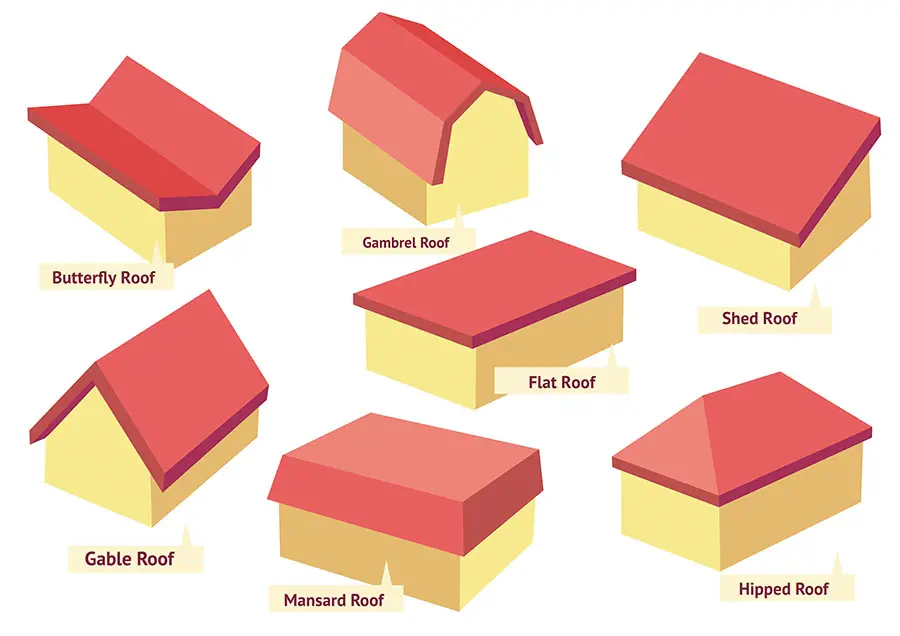
- Pent – This creates a single slanting roof surface, and is most commonly used when the shed roof frame is designed to be an addition to the main home rather than a standalone structure.
- Gable – This style, also known as the peaked gable or the pitched roof, is by far the most popular and most ubiquitous. It consists of a single peak, and then two separate sloping surfaces on either side of it. This single peak structure is what gives rise to the distinctive triangular shape.
- Gambrel – This style, also known as barn style, is the classic style popular in America’s farming communities. Instead of a single slope on either side of the peak, it consists of a double slope on either side. This slightly complicates the process of constructing the roof, but adds to the overall aesthetic appeal.
In addition to these three roof styles, there are five other styles that are typically favorites with residential homeowners:
- Saltbox
- Hipped
- Curve
- Pyramid
- Flat
For the purposes of describing the stages required, however, we will focus on the gable style. The flat roof style, for example, is typically used only for commercial and industrial projects.
Main components
While building a roof follows a relatively straightforward process, homeowners must understand all of the various features involved in its construction:
- Underlayment – This is a protective layer for the roof sheeting that creates an extra barrier between the structure and inclement weather.
- Roof covering – This covering, in most cases, consists of shingles that are laid on top of the roof sheeting and the underlayment.
- Guttering – In particularly wet and rainy climates, particular concern has to be given to proper water drainage. A simple guttering system might need to be installed in order to ensure proper rain runoff, especially during rainy seasons.
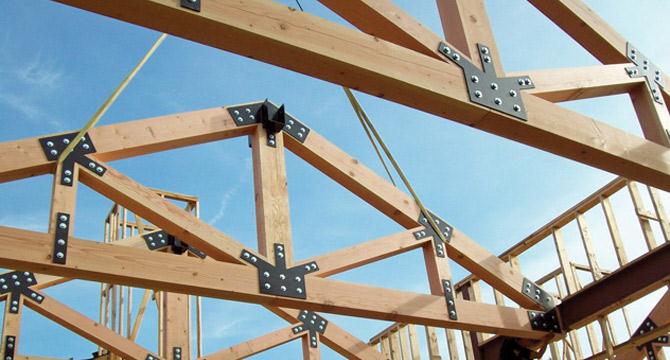
- Roof tie downs – These tie downs (also known as “hurricane tie downs”) are metal plates that can help connect the roof trusses to the walls. Just as you might expect from the name, these metal plates are designed to provide further support to the roof during extreme weather conditions and prevent it from being torn off or damaged during periods of particularly high winds.
- Drip edging – This is a feature that can add extra drainage to your gable roof.
Now that we’ve seen the basic plan for the creation of a shed roof frame, it’s time to move on to the detailed build process.
Process
After gathering all required materials and tools, it’s time to start the construction process for your pitched roof.
Step 1: Build the trusses
As a rule of thumb, you will first need to build the walls and floor before you can start to build the shed trusses. You can build your own shed trusses by using a standard jig.
Instead of working at a table or other raised surface, it’s best to build the wooden trusses on the ground. The purpose of the jig is to make sure that every truss is identical (If trusses vary in size or angles, it will lead to a roof that is not perfectly uniform!).
The trusses will eventually be spaced out evenly along the perimeter of the shed, so the number of trusses required will depend on the size of the final roof area.
The good news is that shed plans will typically identify the size of each part of the truss and how to set out the roof truss jig.
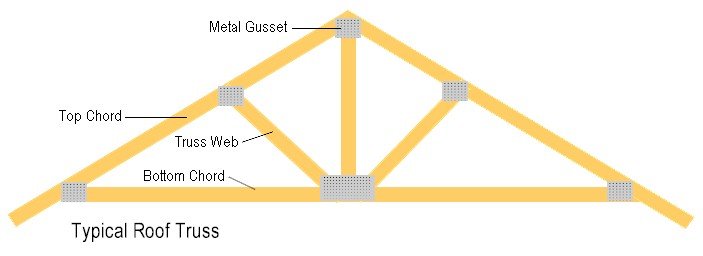
As a guiding point, remember that with a pitched roof, each truss is going to be triangular in shape.
There will typically be a 30-degree angle at the top of the peak and then a 60-degree angle at the point where the truss meets the wall. This is the geometric shape that will provide the greatest stability.
Once you have a good idea of the overall shape of each truss, it’s time to insert the roof truss members into the jig. From there, you can nail plywood gussets into place.
These plywood gussets are needed to ensure the rigidity and structural integrity of the trusses. Once the trusses have been completed, they can be put aside until all the walls of the shed have been fully completed.
If you are particularly concerned about the strength of the trusses, you can also lock them together with galvanized screws for extra support.
Useful links:
Step 2: Erect and secure the roof trusses
In this part of the plan, it is important that all wall panels have been fully erected and you have a flat, completely even surface at the top of the wall in order to support the frame.
Some homeowners like to add an extra layer of plywood to the top of the walls, just to ensure a very snug fit with the roof.
The first trusses that you will erect are the ones at the gable (pitched) ends of the frame. In layman’s terms, you will work from the outside in, adding trusses along the way from both sides, such that you meet in the middle.
Obviously, you have to do all the measurements in advance so you can evenly space out all the trusses. Then, top-nail each truss to the shed walls. Once you lift the trusses into position, they will not stay in place without a little assistance on your part.
You may need to screw in place a horizontal batten brace. The goal here is to have the trusses perfectly secure, upright and fastened for the next key stage of the framing plan.
Useful links:
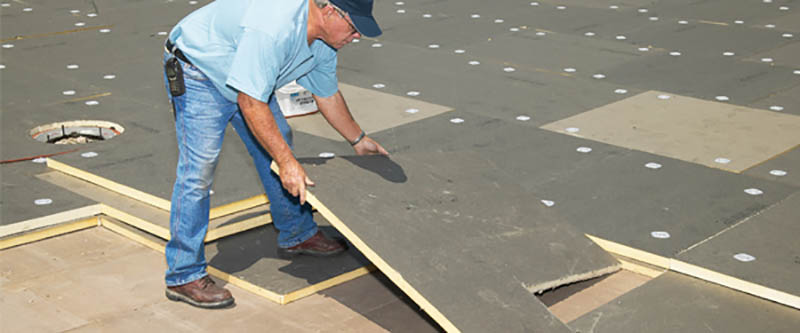
Step 3: Add the roof sheeting
Conceptually, you now have a shed with four walls and a series of trusses extending the full length of the structure.
All that’s left to do is to add the roof sheeting. This, however, requires a bit of preparation in advance.
You will need to ensure this roof sheeting has the proper protection, so you must fix soffit boards, rafter end trim and filler pieces between the top of the roof plate and the underside of the roof deck.
Step 4: Add a protective roof covering
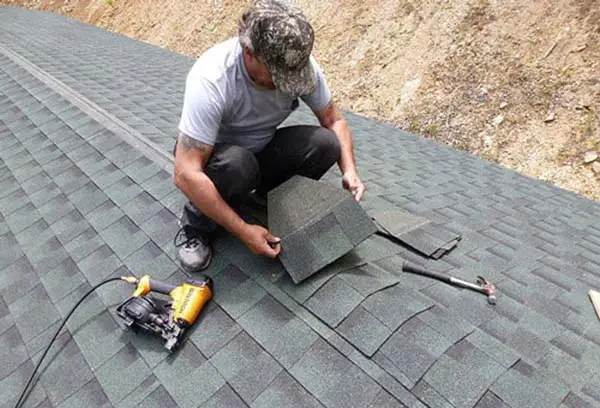
In most cases, you will need to add some sort of protective covering to the sheeting. This is particularly the case if you are using the structure to store weather-sensitive materials.
You really have to lock out the cold, rain and moisture. Thus, a protective covering will typically consist of one layer of roofing felt, one layer of tarpaper attached to the roofing felt with an industrial stapler, and then one additional layer of shingles.
In most cases, traditional asphalt shingles will suffice as a form of relatively affordable, yet durable, covering.
Useful links:
Tools
As you can see, you must have a variety of tools to finish this project. The following is a brief list of some of the basic tools and instruments that you should have on-hand during the project:
-
- Hammer
- Tape measure
- Galvanize screws
- Power drill
- saw
- Extension ladder or other ladder
- (depending on the height of the structure)
- Heavy shears or scissors
- Stapling gun

In addition, you should take into account your personal safety on this project. The following items are useful to have:
- safety googles/glasses
- construction gloves
- Ear plugs (if you are using power drills or other power tools)
- Knee pads
If this is your first time working on this type of project, you will want to pay particular attention to safety issues while you assemble the trusses. If you are not using pre-packaged trusses that can be easily assembled, you must spend time with power tools, making sure all the components are precise.
Conclusion
The process of building a shed roof follows a relatively straightforward approach. Once you have chosen the roof framing that is suitable for the type of shed roof that you are making, then you just need to follow a series of instructions that proceed according to a set plan.
There is a certain balance and precision that helps to make a pitched roof that is sturdy, dependable and very resistant to the weather. Once you have finished the framing process, you will have a storage facility that is limited only by your imagination.
Last update on 2023-07-04 / Affiliate links / Images from Amazon Product Advertising API