Proof extension“>itched roof extension. Your roof acts as a protection cover for your house. It bears the winds, dust, snow, rain and hailstorms, etc. just to keep you and your family safe inside. Therefore, it is your prime duty to ensure that the roof is well constructed.
Contents
The flat roofs are often susceptible to lot of issues and this is the main reason that pitched roofs are generally preferred over them.
Here in this post we have brought pitched roof extension ideas that are inclined purely in your favor. Pitched roof extension can be carried out in kitchen area, shower area and in lobbies. It provides an extra protection and makes the roof competent to the weather damages.
The best part is that you can on your own carry out this process. Are you wondering how to do it? Read on how to build a pitched roof extension and give your place a gift of extra protection.
- The first step in the process is to measure the height of a wall plate, as it would serve as the basis to count the tiles required, truss and laths.
- Fix the rear, as well as front wall plate where you want to build the roof extension with the help of a layer of cement. Put the marks over the area to get an idea as to where the holes would be drilled. Always drill the area in the centre of the brick and not at the joint of two bricks. The depth of the holes should be in tandem to the nuts and bolts, as excessive depth would lead to loose fitting.
- Now put in the bolts in the drilled holes and level the wall plate. Its surface should be straight and smooth to begin the next step. Generally, the nails are 6” so the holes should be drilled accordingly.
- After the front and the rear wall plates are affixed, shift your focus on to the rafters. The rafters will serve as the base of the pitched roof extension so it needs to be pushed up tight against the rear as well as front wall. The rafter needs to be cut according to the distance between the front and the rear wall plate. To do this you can use a measurement scale or put the rafters between the two wall plates and then mark for the extra length of the rafters. The ends of the rafters are to be cut off slightly longer to act as an overhang at the home, as this will serve as an extension of the roof.
- When the rafters are cut in the desired length then you just have to drill the hole through the top side of the rafter so that it fits into the wall plate. Nail the rafter nicely into the wall plate so as to strengthen it properly. At both the ends of the rafters spike 4 ovals wherein the nails would be affixed. This is to make them stronger.
- The rafters should be affixed in such a shape so that they form a triangle. The base of this triangle will be the wall where rear plate was affixed and the two arms will join at the overhanging side of rafters.
- After the rafters are fixed thoroughly over the roof it is time to build a boundary of wall. The gable end of the roof is to be covered with bricks, but what you should keep in mind is that the bricks are below the level of rafters to smooth the surface mortar and cloak strips are used.
- If you are done with the above steps, then you have completed the base of the roof extension. Now this base is to be covered with tiles. You can choose the tiles depending upon the length and width of the pitched roof. Be a little aware about the color as your roof should match the exteriors of your house and should not look like a separate part. The first tile would be placed at the overhanging surface of the rafters so that it forms a passage for the water to reach directly to the gutter. The tiles should be spread in such a manner that each tile should overlap the tile below it. This would save it from forming any gaps which otherwise are the major cause of leakages. Choosing the tiles of appropriate size is very important as you should not end up with small pieces of tiles. These remaining small pieces are not of any use thereafter.
- On the front end just below the rafters, the area can be covered with a soffit. It is installed to carry out the fitting of lights and cables. After the soffits are installed the fascia board should be used to cover the soffit and the visible cables, wires, rafters. The fascist board should be of length equivalent to the distance between the first and the last overhanging rafter.
- The brackets are to be positioned at the edges of the roof to make a space for the rain water to flow. Install the pipe line which goes directly to the gutter. This is to remove the rain water at your pitched roof. With pitched roof, rain water won’t wet your homes! Pitch means slope and water hates the slope and therefore water gets off the roof as fast as it can. If you are not so sure about the gutter fitting, then consult some professional for this task.
Now give it a finishing look. If from anywhere anything is in excess or visible awkward then just cut it off and give your pitched roof a complete and proper look.
FLAT OR PITCHED?
After reading the whole process you might be wondering why a flat roof is not preferred over the pitched roof when it is easier to construct!
It is a debatable issue between a flat and a pitched roof as to which one should be selected. A flat roof V’s pitched roof extension is a topic to ponder as both roofs are in trend.
But a pitched roof has more advantages than a flat roof. The pitched roof helps to create an additional space at the home.
The flexibility of a pitched roof is unmatched with that of a flat roof. A pitched roof is more durable and weather resistant. It can be covered with glass or with tiles to give a contemporary look to the place.
The rooms under a flat roof suffer from extremes of temperature as they are not properly insulated, but a pitched roof disseminates the heat and prevents it from reaching to the room. The pitched roof extension demands less maintenance than flat roofs.
IS IT POSSIBLE TO HAVE a PITCHED KITCHEN ROOF EXTENSION?
People think that it is not possible to construct a pitched roof kitchen extension. They believe that the roof angle is too steep for a small sized kitchen and there are chances for water to seep into the kitchen.
But this is not true! The minimum roof pitches degrees that are required range between 15 to 22 degrees using the clay range of tiles and if the slate tiles are to be used then this range extends to 22.5 degrees.
Building a pitched roof kitchen extension is as simple as building any other pitched roof extension.
For extending your kitchen there can be a number of ideas depending upon the type of property, position of the kitchen and your budget of course! If the tiles don’t work with your space, then you can use glass to cover the roof of the kitchen.
In some places the kitchen roof extension is allowed only with glass and not with concrete material.
And if this is so in your town then you can give a glazed look to your kitchen using a glass roof. The open space kitchen with full natural light whole day will save your electricity bills as well!
GLAZING GLASS LOOK
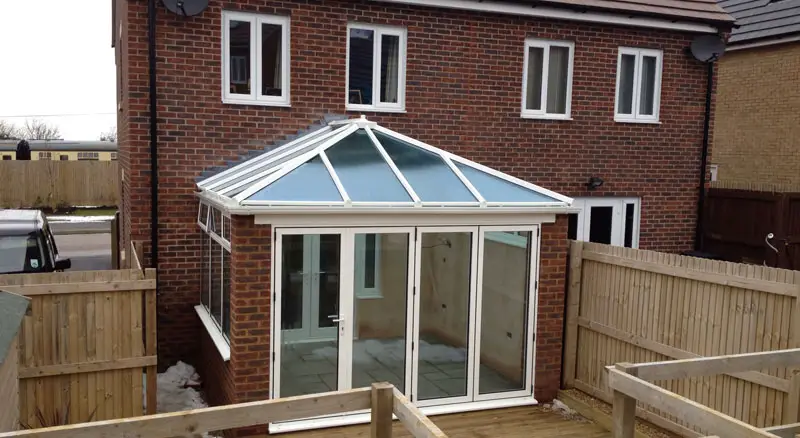
You can make your place brighter and bigger by building a pitched glass roof extension. In this roof instead of tiles the glass is fitted and rafters are coated with stainless steel or any other rust free material.
These frameless extensions with glass corners give an edge to your place. It makes the home bright and helps you in using the extra space. The latest glass technology controls the excess solar heat and is very easy to clean.
You can cover the space in your open area through glass extensions and make a glass covered shower area or a small kitchen.
BOTTOM LINE
Over the years the sloping roof extension is seen as a measure to protect the home from the extremes of the weather and this purpose is fulfilling even now!
But as the times are changing the roofs are viewed as a strong style factor to the home that is durable and stable. The roofs are expected to provide the good thermal insulation and should not heat up the house.
So now you are aware as to how to build a pitched roof extension; take up your kit and begin the process!