Shingling a roof. When it comes to home construction, it’s pretty safe to say that unless you’re a trained professional, certain jobs and tasks can be a little tricky if you perform them yourself. That is why so many people opt to pay a professional to do the job instead.
Contents [show table of contents]
Shingling a roof for example, is an extremely complex process and it is certainly not something that you can do on a whim.
Installing roof shingles requires a great deal of skill, precision, competency, and confidence, so if you feel you’re not up to the task at hand, it may be worthwhile to hire a professional to do the job instead.
Of course the downside to this is the fact that many home construction experts charge a lot of money, which is obviously not ideal in today’s economic climate, especially if you happen to be on a budget.
Although it can be tricky, if you know what you’re doing, use the right materials, don’t cut corners, and take your time, shingling your own roof is entirely possible and could save you a great deal of money in the process.
To help you along and to ensure your home looks as professional and presentable as possible, we’ll now be taking an in-depth look at how to install roof shingles. This will allow you to shingle your own roof, and you can save money, and still enjoy an attractive and functional home in the process.
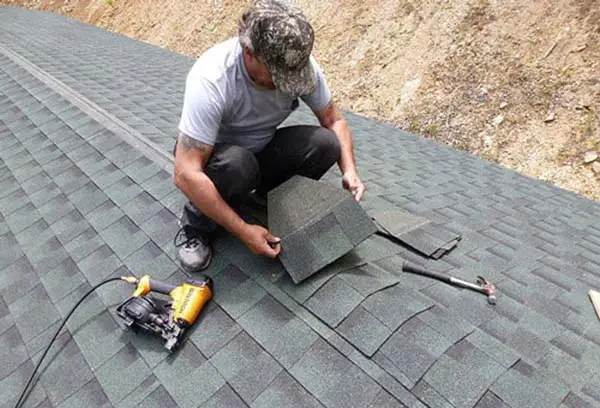
So, without any further hesitation, here is a step by step guide on how to start shingling a roof.
First off, why are shingles so important?
Roof shingles are so important to your home because they protect it from the elements, particularly wet weather such as rain, sleet or snow.
Not only do they protect your home, they also make it look appealing and attractive in the process. Avoiding leaks and water damage to your home is absolutely essential, which is why it’s so important to have a properly shingled roof.
Even one misplaced shingle could potentially lead to disaster in extreme weather conditions. If you follow the steps and guidelines listed below on how to lay roof shingles, your roof can remain free of problems for upwards of 40 years, giving you less to worry about, less work to do, and more money to spend on other things as a result.
Get the correct materials together
One of the most common reasons why so many people’s DIY efforts fail, or never live up to their expectations is because of poor planning.
People rush to the store, grab the minimum essentials and if anything is missing, they simply try their luck anyways. If you’re looking for tips on how to put shingles on a roof, one of the best tips you can benefit from is ensuring you get ALL of the correct materials together well in advance.
Of course you’ll need shingles, which can be purchased online or from your local roofing store or home renovation company.
Shingles come in a variety of different shapes, sizes, and colours, so make sure you choose the right ones that will complement your home perfectly.
Once you’ve chosen the right shingles, which are not only durable and hardwearing, but also complement the colour scheme of your home, you will also need the rest of your materials. These include:
- Roofing paper
- Flashing
- Regular nails
- Plastic cap roofing nails
- sealant
- Roofing vents in either metal or plastic
Gather all of the essential equipment
As far as how to install a shingle roof is concerned, another key factor that must not be forgetten is to ensure you have all of the essential equipment on hand before you even think about beginning. You will need:
- A utility knife complete with roofing blades
- A hammer
- A chalk line
- A spirit level
- A ladder
- Scaffold (if possible)
- A caulking gun
- An air-powered roofing nail gun is also very highly recommended
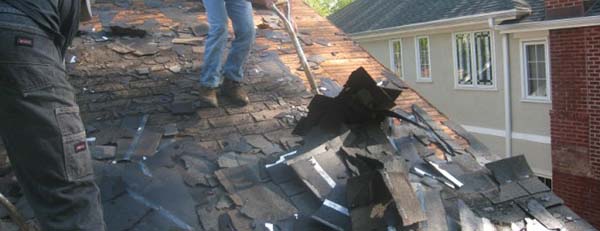
Prep your roof
The roofing shingles installation instructions that you tend to come across in many places actually often skip this part. Yet,a it is crucial and can make or break any successful roof shingle installation process.
To begin with you need to remove your old shingles, but on top of that, you need to ensure that the sheathing underneath is in perfect condition before you go any further. If it isn’t either fix it yourself if able, or get it fixed as it is vital.
Begin shingling
Now that you’re all prepped and organized, it’s time to begin the shingling process. You need to ensure that your roof is 100% water resistant and tight, and that it is perfectly attached to the sheathing underneath.
When people look into methods of how to roof a house with shingles, the results they come across tend to vary, depending on where they come from. We’ve found however, that the following advice should ideally be adhered to when it comes to achieving optimal results, so take a look before you get started.
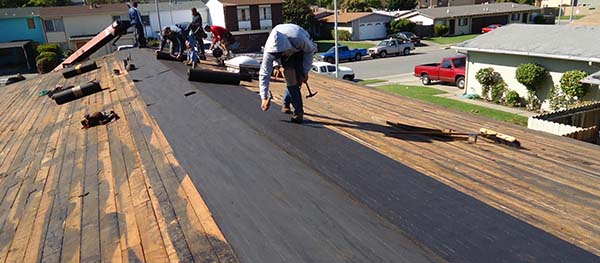
Attach the roofing paper
Now it’s time to really get serious and begin attaching your roofing paper. Roll out a layer of the paper and secure it using your plastic cap roofing nails you picked up earlier. These are essential as they hold the paper in place without ripping or tearing it.
Begin on the bottom left or right hand edge of your roof, overlap the paper edges by a couple of inches, and make sure to leave an inch of paper on the bottom. Don’t worry, you get to tidy the edges next.
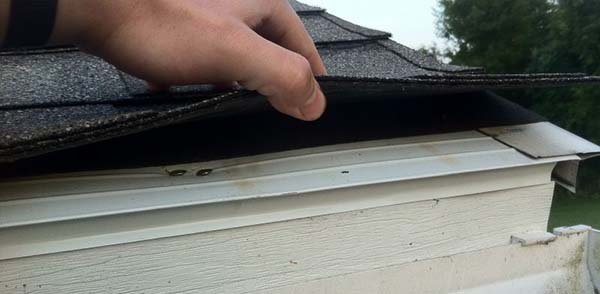
Attach your drip edge
This is a piece of metal in the shape of an L which fixes onto the side of the eave and covers your roofing paper. As the name implies, it is designed to prevent water from penetrating your roof as it allows it to drip away.
Make sure to overlap the joints, lay over your paper, and nail it at roughly 30cm intervals.
Install your first row
This first row of roof shingles is installed in order to ensure the bottom of your roof remains completely water tight.
They are installed inverted with the tabs pointing towards the top of the roof. Next, another row is placed on top and staggered by half a shingle, with the tabs this time pointing towards the bottom edge of your roof instead.
Now you can use this as a base to mark a line of chalk every 10 inches starting from the bottom, all the way to the top to ensure they remain straight, neat, organized, and efficiently placed.
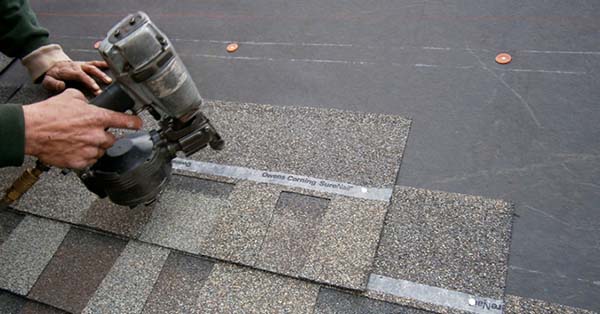
Now the main portion of the roof
Though you have more area to cover, you’ve actually done the hard work already, so this next process is much easier. Horizontal joints should be overlapped, the shingles should remain staggered, and a space of 1/16” should be left between each of your shingles.
To accomplish this, every other row, some shingles will need to carefully be cut in half. Ensure that you attach each of your shingles with four roofing nails, which need to be placed near the top of the shingle.
The reason for this is because the next overlapping shingle will overlap the top of the shingle and therefore hide the nails, improving the appearance. Make sure that you install any required exhaust vents before you install the shingles themselves.
Installing hip and ridge shingles
If your home has different roof surfaces, the interfaces in which they meet one another are known as hips or ridges, depending on who you talk to. Here the shingles meet but do NOT overlap.
Instead, what happens is that another layer of shingles which have been specially cut will be used to cover the entire joint and enhance the appearance. Here you should once again begin at the bottom and work your way to the top, just like before.
Sealing the roof
Now that your shingles are installed and looking great, the last thing you need to do is to use a caulking gun, or an appropriate tool if you don’t have one, to spread the sealant around any vents or joints which aren’t covered by the ridge or hip shingles.
Make sure you apply a generous amount and take your time, as you still want it to look as neat and professional as possible.
A word on the weather
Before you begin shingling your roof, it’s vital that you check with local weather forecasts and see what the weather is going to be doing on the days you plan on working.
The last thing you want is for you to have stripped the entire roofing off your home and for a thunderstorm to suddenly appear and dump several inches of rain onto your essentially roof-less home.
If there is any chance of rain, as frustrating as it can be, don’t risk it, and instead wait until the chances of rain are virtually zero.
So there you have it, your step by step guide on how to put shingles on a roof. The main things to remember are to take your time, to plan carefully, to gather everything you need, and if you are worried you aren’t up to the job, to not be afraid to seek help or to pay a professional.
You may not like the idea of having to pay a pro roofing expert, but if you try to do it yourself, do it incorrectly, and allow water into your home, you may need to spend much more money at a later date anyways, so it’s vital you get it right the first time, one way or another.
Last update on 2023-07-04 / Affiliate links / Images from Amazon Product Advertising API