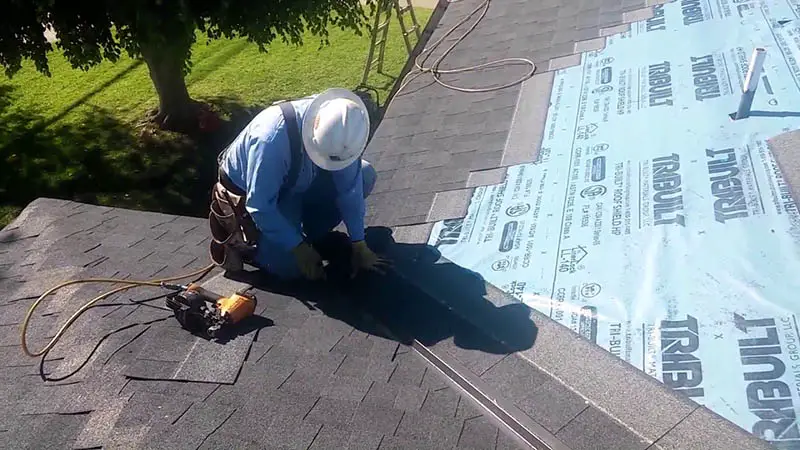
How to roof a house – Roofing a house can easily become a full weekend DIY project, especially if you are looking to install a roof on a house that is non-traditional in size or style.
Contents
As a general rule of thumb, roofing a house involves more than just adding exterior shingles. It also requires a careful and diligent installation of all the other components of a roof system, including the underlayment, metal flashing and ridge cap.
It also requires an understanding of the various materials involved, and how they work together to weatherproof your home.
Materials required for roofing a house
In order to do a thorough job of adding a new roof, you will need the following basic materials:
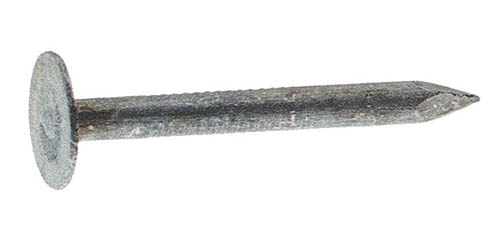
- Roofing nails
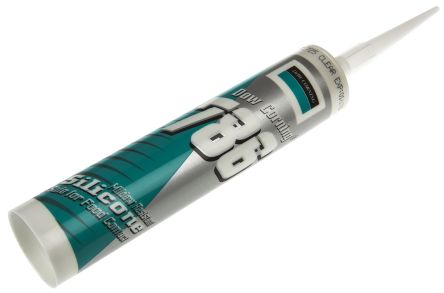
- Roofing sealant
- Self-adhesive waterproof underlayment
- Flashing for vents and valleys
- Drip edge
- Asphalt or asphalt-composition shingles
- Felt paper (either No. 15 or No. 30)
Here, we are assuming the addition of a traditional residential roof, so the choice is for asphalt or asphalt-composition as the primary material to cover the exterior.
Asphalt or asphalt-composition materials are used in the installation of nearly 80% of all residential roofs and generally have a projected lifetime of 20-25 years.
Tools required for roofing a house
Installing a new roof on a house can become a multi-day DIY project, so it’s important to assemble all the tools in advance in order to speed up the completion of the project.
Here is a list of the tools required to put a new roof on your home:
- Extension ladder
- Roof harness (*for safety purposes*)
- Chalk line
- Caulk gun (for adding sealant)
- Air hose or air compressor (for removing debris)
- Hammer
- Roofing stapler/nailer
- Straight edge
- Tin snips
- Utility knife
- saw
- Scaffoldingand tarpaulin (to protect from falling materials)
- Work gloves
Of course, the job of adding a new roof will be a lot simpler if you have a basic, conventional residential roof on your building.
However, if you have a lot of structures on your roof, you need to have the right tools to cut and mold the flashing for an exact fit, which is why you might need the tin snips and circular saw.

10 steps to roofing a house
The following guide outlines the 10 simple steps to adding a roof to a conventional building. Each one focuses on the necessity of integrating every layer of the roof into one comprehensive roofing system capable of withstanding the natural elements.
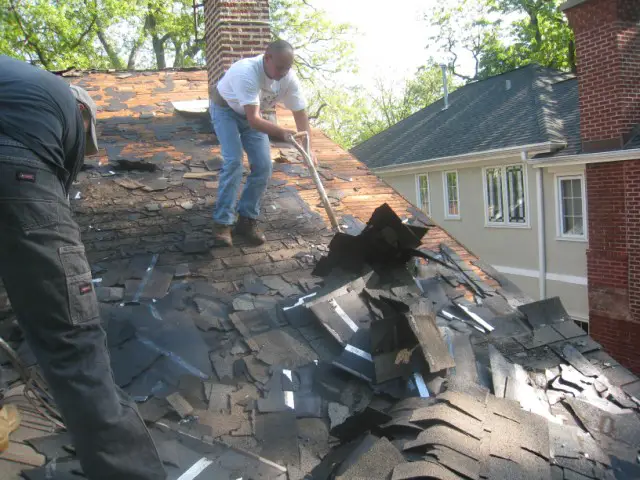
#1: Remove the old roof
The first step is perhaps the most obvious one – you have to strip the old roof clean in preparation for installing the new one. Even if you are just intending to install new flashing and underlayment, you must tear off the old roof first.
As you remove the exterior layers, make sure that you either remove or pound flat any nails you find – you don’t want these nails ripping into the new shingles you are about to install.
Also, since the old roof tear-off will obviously lead to a lot of debris and waste, it’s helpful to lay a tarp around your building to catch any falling debris. You could also set up a trash bin nearby for the old materials you are throwing away.
#2: Install underlayment
At this point, you should have a completely debris-free roof. If not, you can always use your air compressor to clean the surface.
The next step is to apply a self-adhesive underlayment to the bare roof sheathing. This underlayment must be waterproof, since it will act as a barrier against wind, rain and snow. Some building codes, in fact, now mandate how much underlayment must be applied, and how much of the roof it must cover.
Since this underlayment adheres very well to a building structure, you might notice that some of the old underlayment still remains. If you can’t fully remove all of it, that’s OK – just make sure that the roof surface is as level as possible.
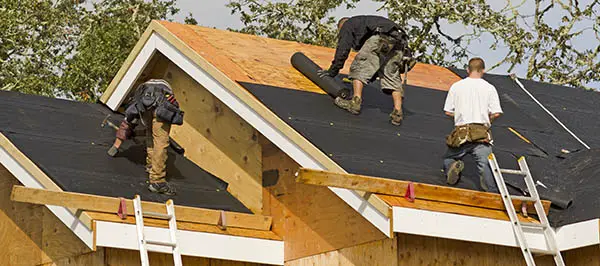
#3: Cover underlayment with tar paper
The next measure is to add another protective layer on top of the underlayment. You must use No. 15 or No. 13 felt paper (also known as “tar paper”), which can be found at any home improvement store.
This felt has been specially treated with an asphalt or asphalt-composition mix to make it impervious to water. As you move up the roof, make sure you overlap each successive layer by about 2 inches.
This overlapping helps to boost the water-resistant properties of your roof, making it less likely that heavy winds will be able to blow water between the layers.
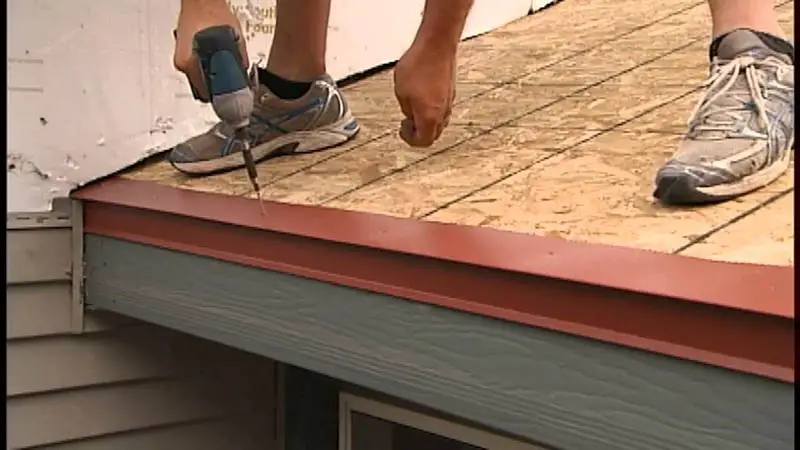
#4: Add flashing
In order to make the new roof look as aesthetically pleasing as possible, most homeowners like to install drip edge flashing along the eaves.
You can simply nail this flashing down to keep it in place. This drip edge prevents any materials from curling over the edge and gives your roof a nice, finished look.
You can also flash the valleys of your roof, since this is where water tends to pool after a heavy rain or significant snowfall. In addition, you need to apply flashing to any structures protruding from the roof such as chimneys or vents.
This flashing provides additional reinforcement and protection against wind-driven rain, so every crease, opening and corner needs to be accounted for. Your roof is only as good as the weakest link in the chain, so attention to detail is necessary.
#5: Lay the starter shingles
Roofing specialists refer to the first shingles laid on the roof as the “starter shingles.” It’s important to get their placement and orientation correct since they provide the basis for the successive rows you will be laying.
Thus, using chalk lines to help guide you is recommended. You must find the center of the roof at the top. From there, snap a vertical chalk line. Using this line as your guide, you will then work left and right of this line in a regular pattern. With some roof types, you might prefer to work left to right.
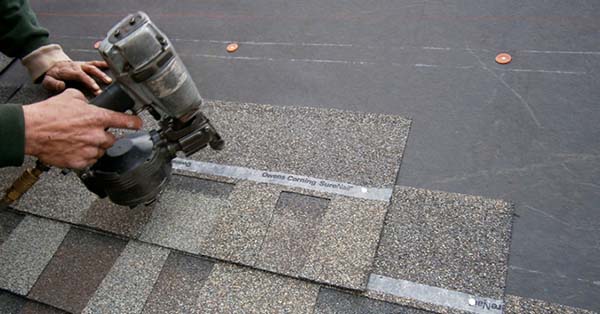
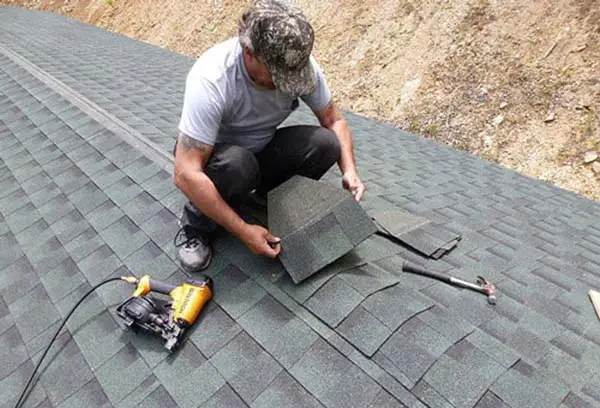
#6: Install the shingles
This is where you will begin laying the exterior layer of the roof of your building. If you haven’t already done this already, you must move the heavy bags of roofing materials to the rooftop.
As you prepare to put down the first row, you simply cut off the tabs from the 3-tab shapes and apply them with their self-sealing adhesive layer. The strips should be facing up along the eaves.
Most roofing specialists will advise that the first row have a slight overhang with the drip edge. This overhang should be no more than ¼ of an inch beyond the drip edge.
Also, keep in mind the overlapping principle. As you work your way along the roof, you want to make sure that each new layer slightly overlaps the previous layer.
#7: Nail down the layers
Roofs need to have maximum protection from wind and rain, so that means, of course, that you will have to make sure that your materials are secured tightly to the surface. The way you do this is simply by nailing them.
Nail each layer of shingles directly on top of and flush with the starter ones.
The choice of how many nails you use for each one is up to you, but the standard number is four per shingle. In some exceptionally gusty or high wind areas, you might want to use as many as six.
If you need help getting the orientation correct, you can use horizontal chalk lines up the roof. You absolutely must make sure that you are laying perfectly straight rows, one after the other.
#8: Install additional flashing if needed
You can never be too cautious when it comes to adding a new roof. You really need to make sure that each structure or architectural flourish has been accounted for. Thus, this is when you must apply dormer flashing.
The dormer is the entire structure protruding from the house that includes the window. You will also need to do a brief inspection of the rooftop to find all the vents and stacks. Any thing that sticks out will need to be covered by protective flashing.
#9: Cap the ridge
The ridge is the very top of the roof. On a traditional building, this ridge is very easy to find – it is simply the top area where the two sloping sides of the roof meet. It’s important to cap the ridge in order to give the roof additional protection.
This is an often overlooked step, but a perfectly straight ridge cap is essential to the full protection of your roof.
#10: Seal up any exposed nails and remove debris
This last step is really a final clean-up step where you take care of all the little details. For example, you may find some nails are still sticking out, so you need to hammer everything flat and seal up any exposed nails. You should also think about sealing up any exposed flashing.
Most likely, you will also have a bit of debris and waste from all of your hard work, so you must cart away all these materials. If you have a trash bin nearby, it might be easier to simply deposit them directly into the bin rather than worry about carrying them down a ladder.
Safety considerations when roofing a house
It needs to be pointed out that any time you are working up on a roof, you need to take extensive safety precautions – both for yourself and for anyone on the ground below.
Dangerous roof falls are more common than you think, especially if you are hauling heavy materials up and down a ladder. That’s why many people advise using a full fall protection kit.
Moreover, since you are working outdoors, there is always the risk of a slip-and-fall caused by unexpectedly slick surface areas on your roof. The type of shoes you wear matters very much: they must be able to give you plenty of traction on the roof surface.
With that in mind, here are a few basic safety guidelines to keep in mind:
- Use a fall protection kit comprised of a safety harness, rope and hook
- Wear shoes with rubber soles capable of gripping the roof’s surface
- Wear hard hats in the vicinity of your roof
- Use a ladder that has been tested to hold significant weight
- Extend the ladder to more than 3 feet beyond the edge of the roof to make it easier to get up and down
Additionally, the types of tools and materials that you use also matter. The higher quality the tools you use, the less waste you will have, the less energy you will exert on the job, and the less chance you will have of making a mistake.

Conclusions
As you can see, adding a new roof is about much more than just borrowing an extension ladder, climbing up on your old roof and adding a few rows of shingles. Most importantly, you have to take into account the various layers of your roof and how they work together.
This is especially true if you have structures such as chimneys or vents on your roof.
Most roofing experts, in fact, will refer to the entire “roof system,” just to make it clear that the waterproof underlayment and metal flashing added during the installation matter just as much as the choice of the final exterior layer that you are putting on your building.
The good news is that if you pay careful attention to the design and installation of your roof, you will have a roof that lasts for at least 20-25 years. Of course, it must still be inspected regularly and repaired after any major storms, but you will have a roof system capable of protecting you and your family from rain, wind and winter storms.
Last update on 2023-07-04 / Affiliate links / Images from Amazon Product Advertising API