Flat Roof Construction – Creating a flat roof can be completed as either a DIY weekend project or by a professional contractor. For first-time homeowners, it’s typical to hire a professional contractor who can complete the flat roof installation for you and offer a full warranty for their work.
Contents
Homeowners can choose between several different flat roof designs, and all of them cost approximately the same, but prices can vary according to region and roof size.
Generally speaking, the bigger your roof and the sturdier the weatherproofing material, the more you will pay for your design.
Flat roofs can come with a 10-year, 15-year or 20-year warranty. If they are maintained and planned well, though, they may last as long as 25 years.
Some warranties can offer many details on what’s covered for each type of design.
Why do people build flat roofs?
When most people think of roofs for their homes, it’s natural to think of classic pitched (i.e. sloping) roofs. However, there are several reasons why homeowners might need to consider and design a flat roof installation:
- Zoning or planning ordinances restrict the height of new construction
- Building a pitched roof would obstruct your neighbors’ views
- Building a pitched roof would block sunlight
- Creating a home extension results in a structure like a shed that fits right up next to an existing building, leaving no space for a pitched roof
You can think of a flat roof for a garage extension or shed that connects with the main house as an example of a flat roof installation project.
Some architectural styles that feature big, boxy designs would be a natural fit for a flat roof.
What types of flat roofs are there?
The two classic types of flat roof designs are the warm flat roof and the cold flat roof. In addition, there’s a third type – the warm flat roof with airflow – that’s essentially a hybrid version of the warm flat roof and the cold flat roof.
There are design differences for each type.
The major difference between the warm flat roof and the cold flat roof has to do with the air flow between the roofing timbers (known as “joists”) that help to hold up the roof.
In the warm flat roof construction, there is insulation packed into every possible space where air can flow. In creating the cold flat roof, air is allowed to circulate freely between the joists and there is no insulation.
It’s important to keep in mind that installing a flat roof is a largely an either/or proposition: EITHER no air is allowed to circulate OR there is constant airflow throughout.
Problems can arise if air is allowed to move, but not freely. This creates the potential for condensation due to the gaps in temperature; if too much condensation builds up, it can cause the wood to rot away, especially with an outdoor shed.
For that reason, cold flat roof construction needs to keep in mind the need for unblocked airflow.
The 3 most common materials used for flat roof construction
There are several methods and materials for the design of the exterior surface of a warm or cold flat roof.
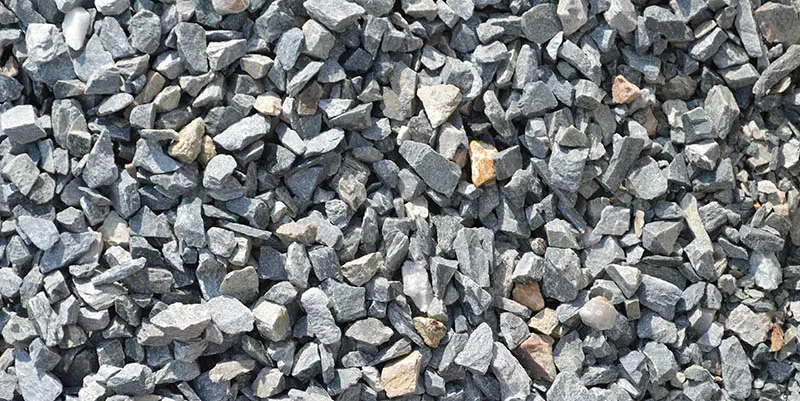
Material 1: Hot tar and gravel
Also known as the built-up roof (BUR), this type of flat roof features three or more layers of waterproof material, mixed in an alternating fashion with hot tar and a layer of smooth stone-like gravel.
As you might imagine, this is the cheapest version possible and good for covering a shed.
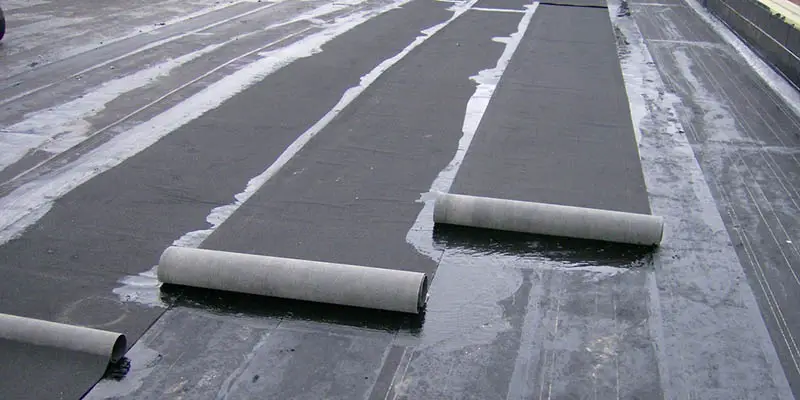
Material 2: Modified bitumen
This involves a single-ply rolled roof that creates a protective layer against ice and water. It can be made stronger with a mineral-based surface. To guarantee the material stays secure, most of these materials come as peel-and-stick systems that are easy to apply.
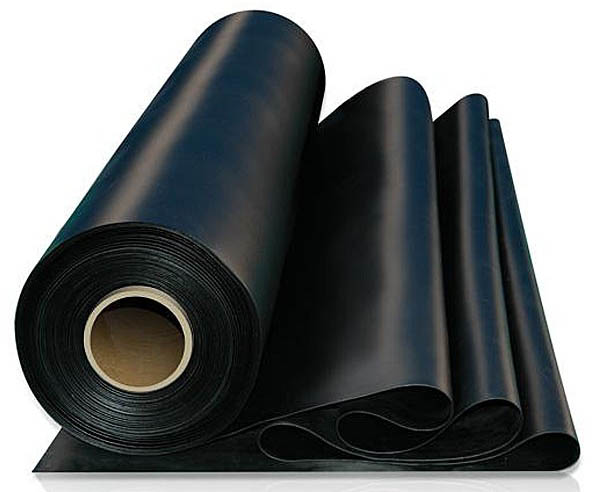
Material 3: Rubber membrane
Also known as EPDM (ethylene propylene diene monomer), this is natural rubber – the kind you might find on a car tire or an inner tube. It’s durable, and can be fastened to the roof with fasteners and glue. This is probably one of the easiest versions for a DIY project.

A list of materials for flat roof installation
Depending on the type of roof you’ve chosen – either warm flat roof or cold flat roof – you’ll need to gather a number of important materials to build a flat roof.
In addition to basic tools such as a drill, utility knife and measuring tape, you’ll need the following basic materials, knowledge of local regulations, and a set of detailed instructions:
- Roofing timber (known as “joists”)
- Steel joists (known as “steels”)
- Rubber EPDM membrane (or other exterior covering)
- Water-based adhesive
- Plywood
- Foam with fiberglass backing
- Copper flashing
- Insulation (for the warm flat roof only)
The basic construction process
To build a flat roof, you’ll want to have a thorough understanding of how the process of constructing the flat roof works and the different methods available. That will help you remember certain factors and details to build the best possible flat roof.
Having a manual for warm flat roof construction with details and a summary of rules to follow helps.
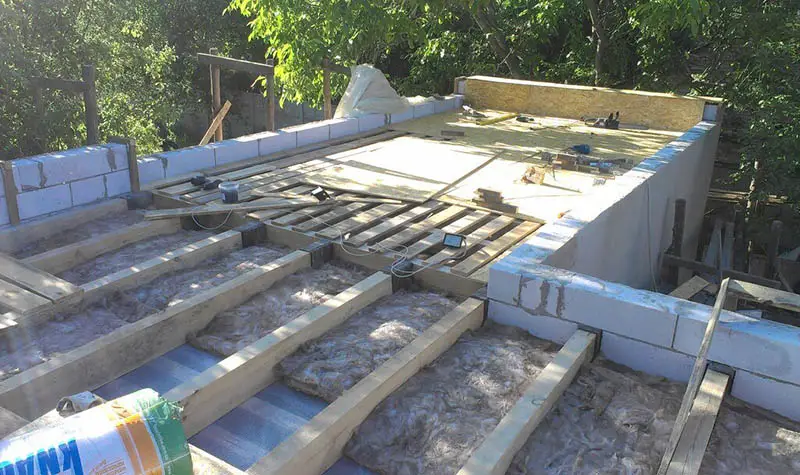
The basic construction of a flat roof starts with roofing timber that is laid across two upright items, usually two walls.
For additional stability, you can also use steel joists that are built into one or both of the walls. This will give additional stability to the roof structure.
Then, this roofing timber will be placed on top of the steel joists, which are built into the walls. In some cases it is actually cut into the steel, but in most cases it will be simply laid on top of the steel joists.
Depending on the size of the roof, the joists are placed a specified distance apart to minimize the weight-bearing load on any of them.
You can often consult an online chart to find the optimal distance based on the width and span of the roof. Generally speaking, the bigger the roof, the more joists you will need to hold up the roof.
You will then add a plywood covering over the joists, what some home professionals refer to as the “decking.” Again, the width of the decking will depend on a number of factors that will impact how sturdy the roof is.
You want enough to protect the structure, but not too much weight. You will also need a frame for a slight incline. This frame is important.
The next step is to think about weatherproofing and waterproofing the boards that are laid across the joists. The classic option is EPDM rubber (or a combination of rubber with felt or fiberglass).
This is used to cover the boards and make them waterproof. With some sealant, you can create a very safe covering. You can find more details in a flat roof construction manual.
In order to make the roof as stable and strong as possible, you will also want to give some thought as to how the decking and the joists will fit together.
One classic approach is to use what is known as a “tongue and groove” fitting, in which a slight cut out in one joist is placed into the other. This helps to secure them closely together, almost as if they are “locked” together.
The 8-step process for DIY installation
Below is an easy-to-follow manual for building flat roofs, including a guide to flat roof framing and installation with plenty of details and specifications about the frame. If you want a DIY flat roof, here are the steps to follow.
Step 1: Frame the roof
One important – and perhaps not so obvious fact – is that a “flat roof” is not actually flat. That would be impossible, since a flat roof would receive so much weight from water buildup and snow buildup that it would not be long-lasting.
So every flat roof actually has a gentle rise and fall created by a “frame” that enables water to run off the roof naturally, and thus avoid any problems caused by weeds or other plant matter starting to grow on the roof.
Flat roofs are always built at a slight incline, at least 1/8 inch per foot. Some roofs actually slope in several directions, ensuring optimal water runoff. This will help you create a flat roof framing plan.
When framing a flat roof, you will need to create a slight incline. You can do this with a foam layer that exactly fits your roof.
For very small roof jobs, you can achieve the same effect by taking 2x4s and converting them into long wedges that you can then nail to the joists. These will be larger and closer together than on a pitched roof in order to handle any snow or water.
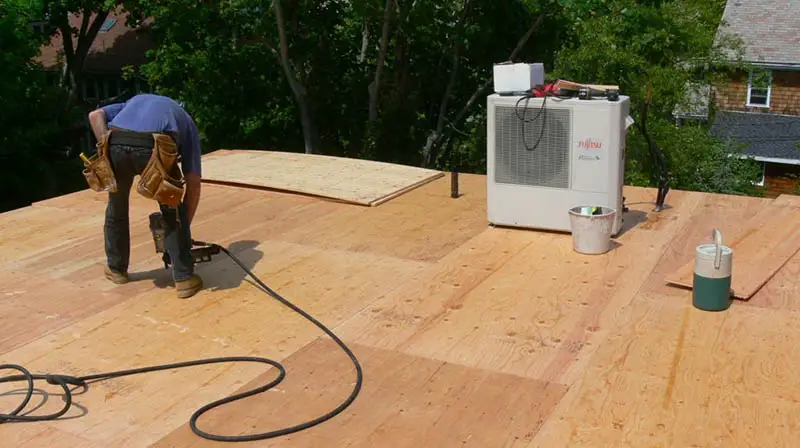
Step 2: Add the plywood
Once you’ve added the framing, it’s time to add a layer of 5/8-inch plywood sheathing. You will want to make sure that there is at least a 1/8-inch gap at all the joints to allow for contraction, expansion and the natural movement of the roof.
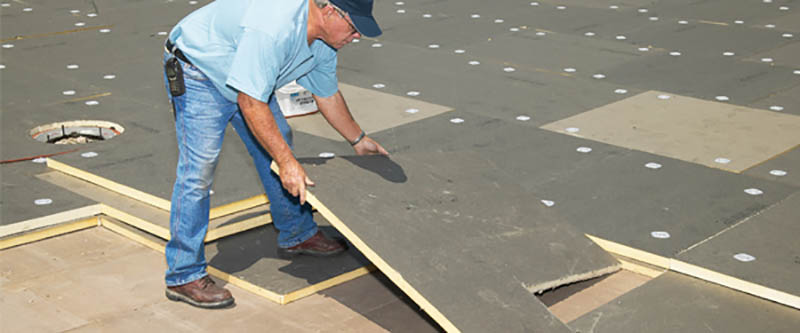
Step 3: Add the underlayment
You must now create a soft, protective base for the rubber. You can do this with an IsoBoard, which is a piece of 1/2-inch-thick rigid foam with a special fiberglass backing. You can cut this IsoBoard easily with a knife.
Once you have the right size, you can secure it to the plywood sheathing with screws and steel washers. You will want to make sure that all the pieces fit snugly against each other. This is important for the installation.
Step 4: Create the corners
During the installation, you must ensure that no water is able to pool and collect at any inside corners of the roof, especially if the roof includes a parapet, which is a very short wall common around flat roofs.
To prevent any pooling, you will want to use 2x4s that you can cut into the proper size. You can then screw them into the joint between the roof and the wall to create a gradual transition.
Step 5: Complete the dry-fit process
Now comes the time in the installation when you put down the rubber. So first make sure there are no loose items or debris on the roof.
Then take the rubber, which usually comes in big 10-foot rolls from the local hardware or home improvement store. You can cut these rubber rolls with a utility knife.
The goal is to cut a piece that is big enough to cover the roof as well as leave an additional 9 inches around the entire roof.
You will then take the huge piece of rubber, spread it carefully in place, and then take the additional overlap and fold it back on itself.
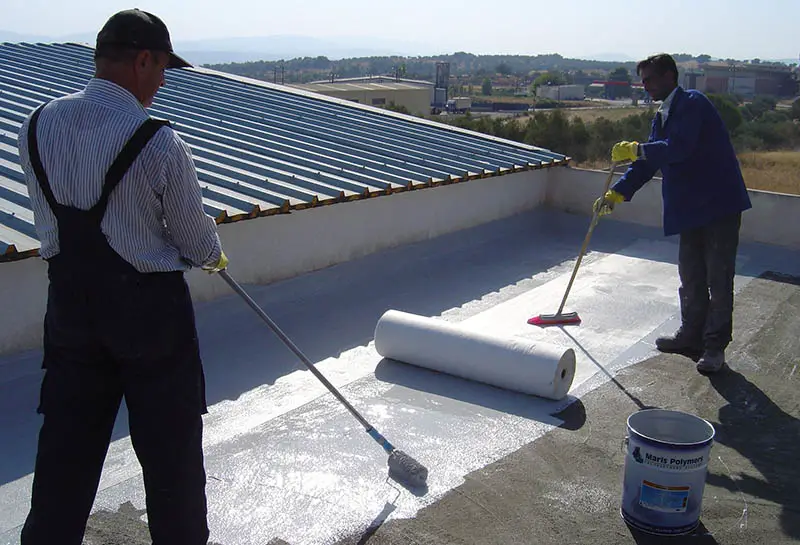
Step 6: Secure the rubber with glue
You have two elements that need to be glued together – the folded-over rubber and the IsoBoard. You’ll need to spread the glue over both, preferably with a paint roller on an extension pole.
This glue is going to bond almost immediately, so ensure you have both pieces positioned correctly.
After the glue seems to be almost dry, you can finish the spreading process so there are no wrinkles.
Now it’s time to go back over the roof and make sure there are no air bubbles. Any extra edges you can glue to the roof and wall. You want a very snug fit.
Step 7: Finish off any edges
At any inside vertical corners, you can cut and overlap the EPDM rubber, and then use rubber adhesive to glue it down tightly.
Then it’s time to seal this seam. And, to prevent the vertical sections from peeling off the walls, you may need to screw on metal brackets known as termination stops. You can cut off any excess above the brackets for a better fit.

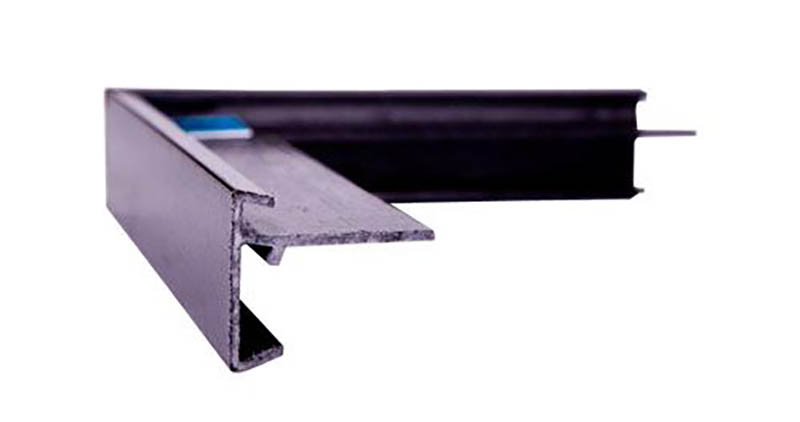
Step 8: Add a copper flashing
As a last step of installation, you can nail down a custom lead-coated copper flashing over the front edges of the roof, then glue down a 12-inch strip of uncured rubber over the flashing’s top nail edge.
Other factors to keep in mind for your flat roof
Of course, when I comes to flat roof construction details and specifications, you’ll have to remember certain regulations about building a flat roof. Many of these flat roof building regulations pertain to the ability of the roof to withstand quite a bit of weight.
That’s because water puddles, if allowed to form on the roof, can generate a lot of weight. Over time, that could lead to sagging structures or the rotting of your roof entirely. You can find more details on these regulations and specifications in a manual.
There’s also the matter of the best way to protect your roofing plywood decking from the impact of weather. Some regulations will also address this factor.
That’s why it’s vital to keep in mind weatherproofing materials that can act as an additional layer of protection. Once a roof has started to rot – such as from condensation buildup – it is very difficult to repair
Conclusions
There are a number of pros and cons for any type of flat roof – either warm or cold – that you may decide to install yourself with the help of a manual. (especially a flat roof construction manual).
Just keep in mind basic principles, the regulations to follow, and understand the trade-offs involved in using specific materials for a DIY flat roof.
While it’s important to keep down the costs of any DIY roof project, it’s also important to have the highest-quality materials that will ensure that the roof lasts as long as possible.
Last update on 2023-07-04 / Affiliate links / Images from Amazon Product Advertising API