Building a pitched roof. A sloped roof has numerous advantages over a flat roof, the most important of them being that it allows for quick and effective water runoff.
Contents
Snow and rain, which usually pile up on a flat roof, run off the slanted roof, thus prolonging the lifespan of the roof. Slanted roofs, which come with 2 angles meeting in the center, are known as pitched roofs, while the ones with a single slant are known as skillion roofs.
Sloped roofs are very easy to install and can even be done by people without much building experience.
Metal building roof pitch is ideal for commercial and industrial buildings since it protects the roof against the natural elements and allows the water and snow to drain away easily from the roof’s surface.
However, building a pitched roof involves lifting heavy timbers and it is therefore recommended that you ask for help before going about the project.
Anybody equipped with a few elementary tools and possessing a basic knowledge of woodwork can easily undertake this project with a few helping hands.
If you want to know how to build a sloped roof shed then keep reading this article, where we are going to take you through the entire process step by step.
BUILDING A SLOPED ROOF
People wondering how to build a sloped roof need to know that this project can easily be accomplished by anyone without the need of a professional.
However, a sloped roof can only be built if one of the walls of the building stands taller than the other. In case the opposite walls are of equal height, then you will have to elevate the level of the wall by installing additional plates or you can also create a separate frame for the wall and then install it on the top of the wall.
Once the level of the opposite walls is unequal to the desired degree, one can easily make a sloped roof to join them. Make sure you go through the building regulations of roof pitch before you start building your sloped roof.
Measuring the span of the shed
Before starting the project you will need to measure the exact shape of the roof that you are about to cover. The required lengths of the common rafters can be determined only when the span of the shed has been measured.
Use a measuring tape and figure out the dimensions of your roof. In case there’s a wall which can be used for constructing the awning, then you need to make sure that it can bear the load.
The length of the rafters which you are going to use for the project is derived by taking the total span of the shed and then deducting the thickness of one wall from that number.
MEASURING THE RISE OF YOUR SLOPED ROOF
In order to measure the rise of the roof, you need to figure out the length difference between its two walls.
Once you know this length difference you need to add it to the width of the common rafter and then deduct from this the value of the seat cut. Measure in inches and multiply it by the length of the run in feet. Now that you have this figure, you have to divide it by 12.
This number now obtained is the exact measurement of the common rafters which you will need for spanning the external wall and reaching up to the inner side of the wall opposite.
You need to keep in mind that a very steep roof is not needed for easy water runoff. Just a few inches’ difference in height generally will suffice, but if you live in areas with heavy snowfall then you can go for a deeper slant.
How to build a pitched roof frame: Now you have to add a beam from the timber on the high side of your sloped roof. Make sure that this timber has been cut down to the right length.
In case you are installing off the side of your wall, then you need to bolt the timber in its place, keep it firm and, by making use of a spirit level, you need to ensure that it’s levelled.
Another beam of similar length needs to be installed in the other side of your roof in a way so that it lies parallel to the first beam. But this second beam has to be installed at a height lower than that of the first one.
The supporting posts have to be installed vertically, leaving a space of about 3 feet from one to the next. Now you have to dig holes in the ground and fix them with quick-drying cement before you go for the second beam on the roof.
Before you proceed, make use of a plumb line and ensure that the posts are standing upright.
Add the trusses
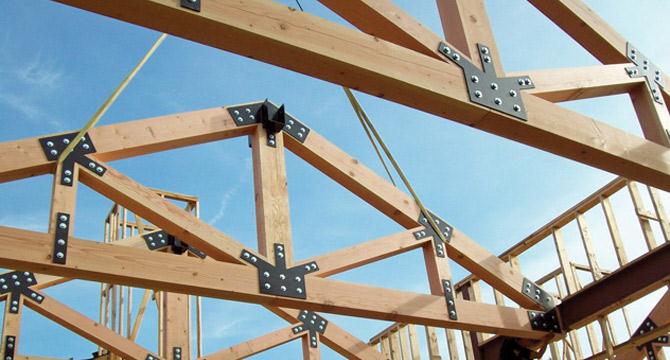
Adding the trusses will make your roof stronger. The trusses can be installed 3 feet apart all along your roof in a way which would allow them to lie between the beams and at a right angle to them.
Cut the 4’’ lumber to the right size so that it sits neatly between the beams. Now hold them in place and attach them to the beams with 7” wood screws. You can always make use of extra timber at the intersecting points for additional support.

The covering
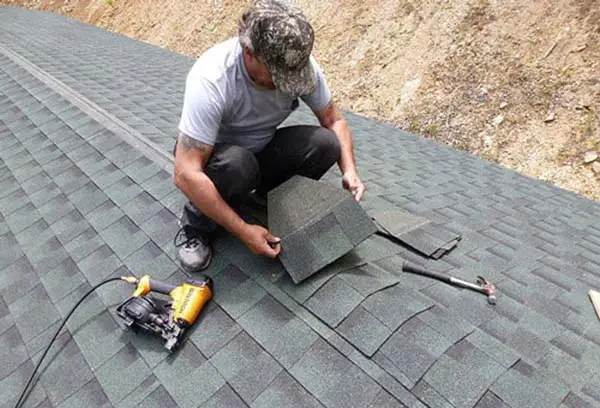
Now that the structure of your sloped roof is ready, the next thing you need to do is add a polycarbonate covering. You can also cover the top with plywood and cover it with shingles, felt or EPDM membrane.
Now that you know everything about how to build a pitched roof on a garage let us proceed to the next part, which is how to build a pitched roof over a deck.

HOW TO BUILD A ROOF DECK ON A PITCHED ROOF
Roof decks are extremely popular since it gives you a chance to make good use of your otherwise unused roof space and create a tiny private retreat for your family.
Building a roof deck on a pitched roof needs a different approach of framing beneath the joists. Framing your roof deck doesn’t involve a ledger attached to the rim joist of your home.
What you need instead is a pair of beam rests on the sill plates which would act as the frame for your roof deck. So when you have all the beams in the right place along with the joists, balusters, handrails and deck boards, the building procedure is no different from any other deck.
Let us now get to our next project, which is how to build a roof deck on a pitched roof.
BUILDING YOUR ROOF DECK ON YOUR SLOPED ROOF:
- Step 1: Firstly, you need to get ahold of all the requirements of a roof deck on your pitched roof from the permit office of your jurisdiction. Note down any special setbacks or rules and relay them to your architect.
- Step 2: Now you have to cut four 2/6 lumbers to 1 foot length for the sill plates which would act as supporting bases for each end of the pair of beams on the front and the back of the deck. Make sure that the plates are attached over the strong areas of your roof.
- Step 3: Consult your architect and create the beams according to the specifications suggested. For instance, you might need to create a 4×10 beam from 2×10 pieces of lumber. Now clamp the lumber and mark the bottom and top of the beam at three feet three inches in from the corner. Now you have to drill through both the lumbers at each mark with a paddle bit. A galvanized lag boat needs to be pressed through the front of the beam into all the drilled holes and a nut and washer need to be placed on the back of the beam. Now the nuts need to be tightened with a ratchet wrench.
- Step 4: One beam needs to be set on the front of the pitched deck vertically on the front sill plates. Now a hold-down needs to be placed on both sides of the beam on top of one sill place. The holes in the hold-down need to be marked and the beams are to be set aside.
- Step 5: Now you have to drill the pilot holes through the sill plate with a 3/8” wooden drill bit through the marks. You have to drill deep enough so that it accepts a 3/8” threaded rod which will serve as the anchor.
- Step 6: In this step you need to epoxy the threaded rod in its place and allow it to set.
- Step 7: Now you have to place the beam between the hold-downs and mark the holes on the top arm of the hold-down. Now you need to drill through these marks and insert a galvanized bolt through the hold-downs.
- Step 8: This step involves setting the rear beams over the rear sill plates. The same procedure has to be followed. Lastly, you have to install the joists on top of the beams along with the posts, deck boards, balustrades and handrails.
